Skip to content
RT_E2_Logo

SUSPENSION & ENGINES

  • SEARCHES
    • Product Search
    • DVS Valving Search
    • Spring Rate Search
    • TNK Fork Tube Search
    • Instructions Search
    • Basic Setup Search
    • Engine Search
  • PRODUCTS
    • Suspension
    • Engines
    • Lubricants
    • Tools
      • Fork Tools
      • Shop Tools
      • Shock Tools
      • Dyno Mounts – CTW and Roehrig
      • Engine Tools
    • RT Merch
    • Stickers-Banners
    • Suspension Bible
    • Vintage (pre-2000)
  • SERVICES
    • Suspension
    • Engines
    • Brake Arcing
    • Race Tech Centers
  • ABOUT
    • About Race Tech
    • Contact Us
    • RT Policies
    • Rider Support
  • RESOURCES
    • Instructions
    • Service Request Forms
    • Shipping
    • Contact Us
    • Suspension Bible
    • Mental Edge Video
    • Seminars
    • Downloads
  • LOGIN
  • CART
PRODUCT SEARCH
DVS VALVING SEARCH
SPRING RATE SEARCH
ENGINE SEARCH

WP Bladder Forks
Cartridge Assembly - Details Only

►Click here for general rebuild instructions.

WP Dual Chamber Bladder forks are essentially the same as Showa and KYB forks in their basic disassembly and assembly. Instead of repeating the steps that these forks have in common this Slide Show focuses only on the details of assembling the bladder cartridge. The rest is the same.

►Click here for general rebuild instructions. Fork Gold Valve Installation and Fork Rebuild - Twin Chamber

Consult the instruction sheet that comes with the Gold Valve Kits for specific procedure for building the valving stacks. See your DVS Setup Sheet for valving and setup recommendations.

Once again Master Suspension Technician Alan "AJ" Peck is the man model. Can you believe he wants to be a fireman? Maybe it's the suspenders.

CARTRIDGE ASSEMBLY
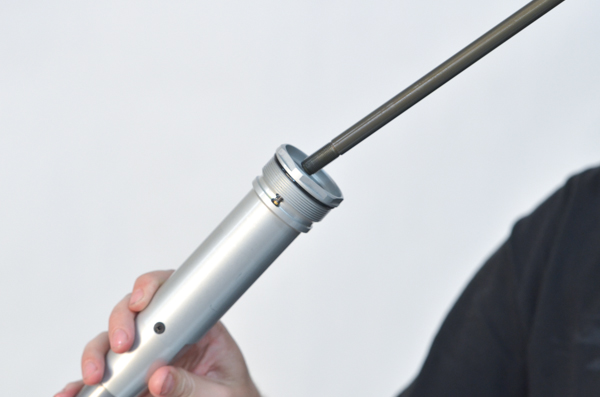
CA1-  Once the valving is complete, begin assembling the cartridge by inserting the completed damping rod assembly into the cartridge.

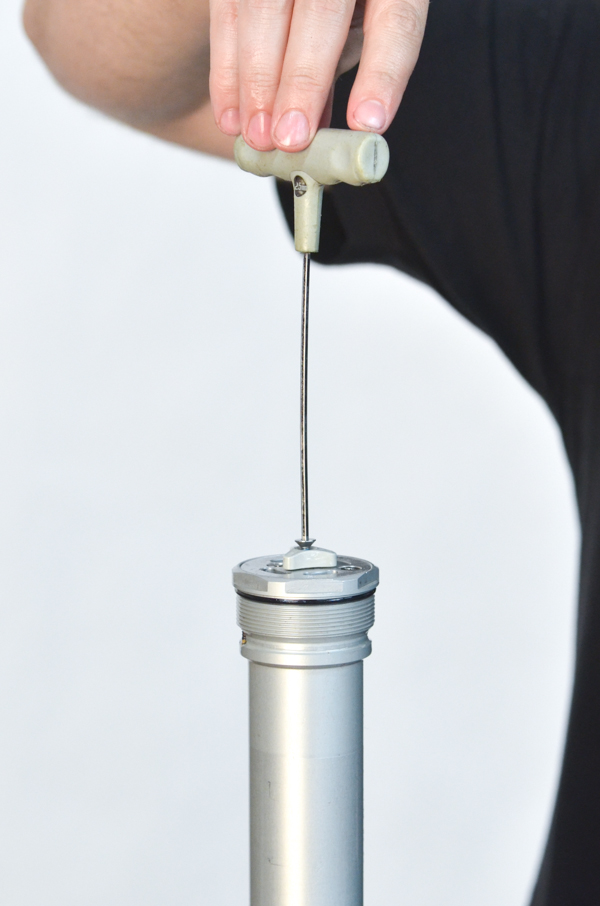
CA2- Line up the end of the damping rod with the seal. Use a 10mm t-handle on the top end of the damping rod. Do not attempt to "screw" it in. Give it a sharp rap with the heel of your hand to push the bottom end of the damping rod through the seal.

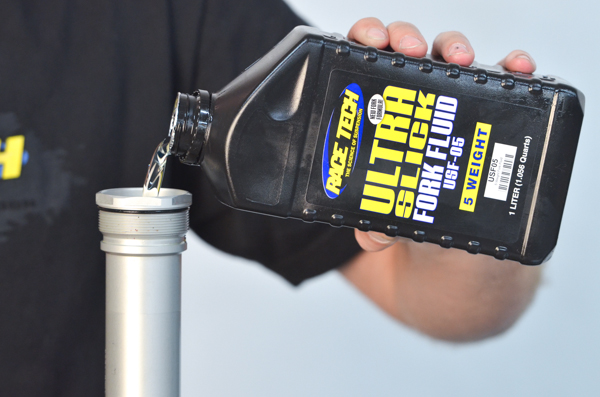
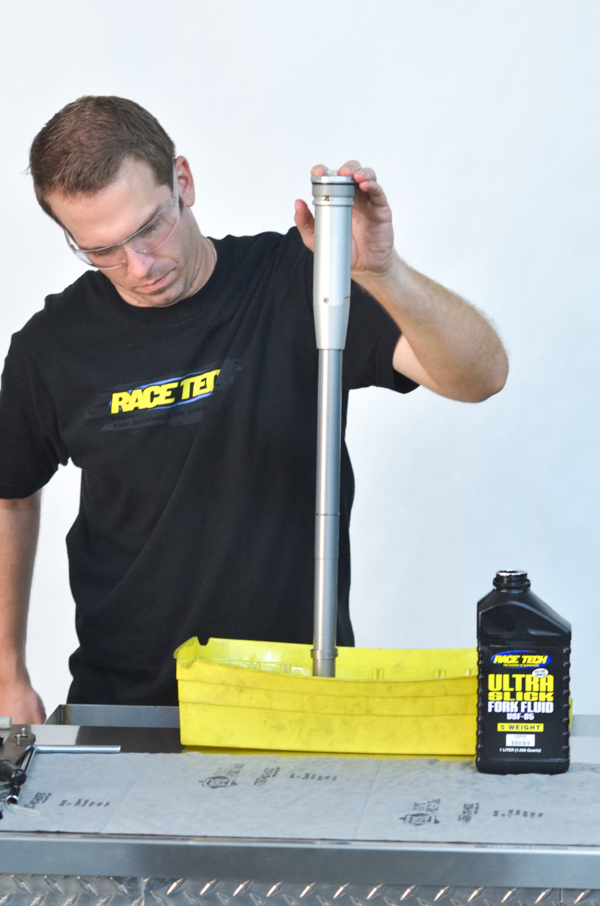
CA3- Fill the cartridge with USF-05 oil.

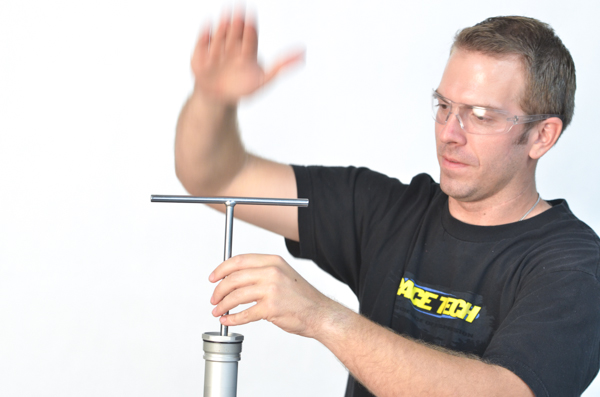
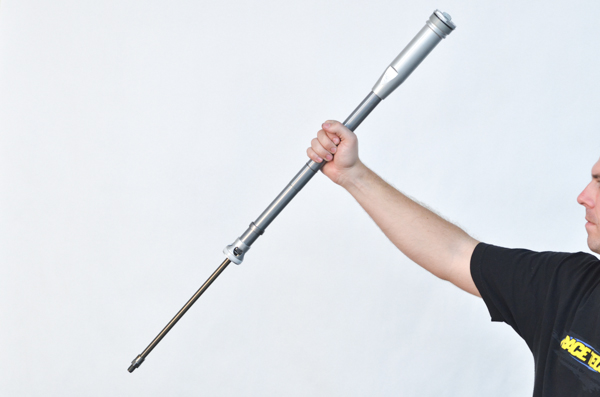
CA4- Bleed the cartridge by slowly compressing and then extending it. Make sure the compression stroke is slow or it will cavitate and create more bubbles.

CA5- Pressurize the bladder with only enough pressure to make the bladder taught (it's normal shape). This will be less than 1 psi.
Another method of returning the bladder to its normal shape is to pinch the bladder at the cap. This will make a small opening in the sealing surface and allows air to enter. If it does not look "taught" you will need to pressurize it with a needle.
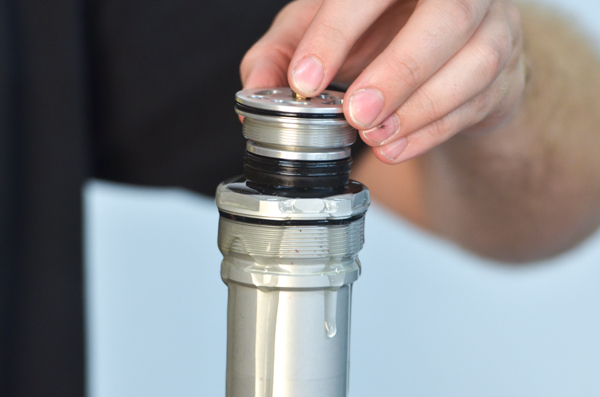
Insert the Compression/Bladder Assembly into the end of the cartridge. Be sure there is enough oil so that the cartridge overflows.

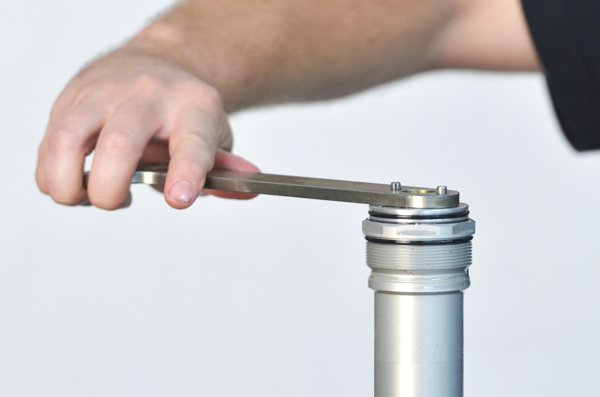
CA6- Tighten the Compression/Bladder Assembly with a Fork Cap Wrench (TFCW 50H). As it is screwed in, the bladder will compress slightly. Don't worry the next step will restore it to its original shape.

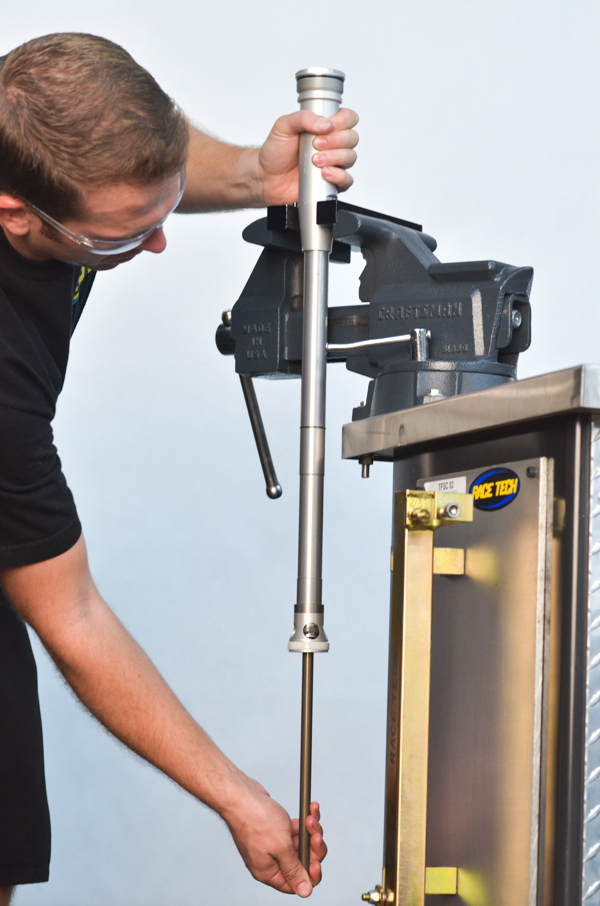
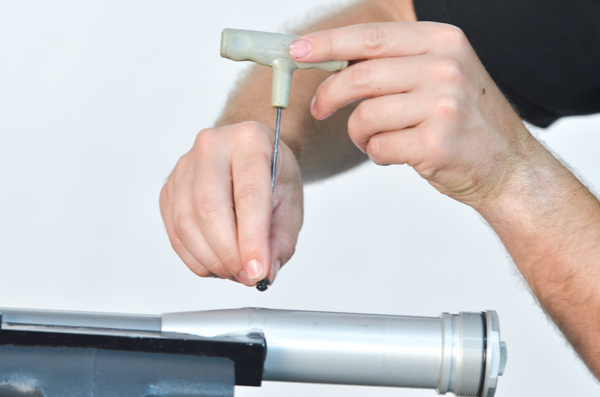
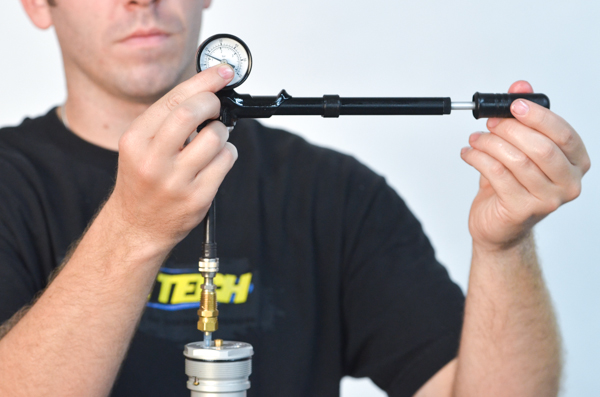
CA7- Hold the Cartridge in a vise as shown with the cartridge slightly angled so the Bleed Screw is at the highest spot.
Remove the bleed screw. This will release any trapped air and allow the bladder to expand to it's original state. A bit more oil will dribble out.

CA8- Reinstall the bleed screw.

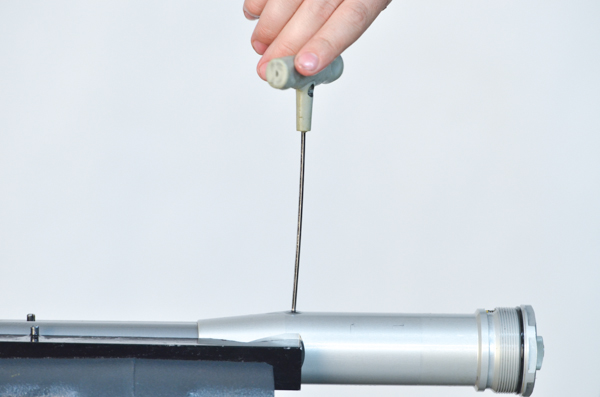
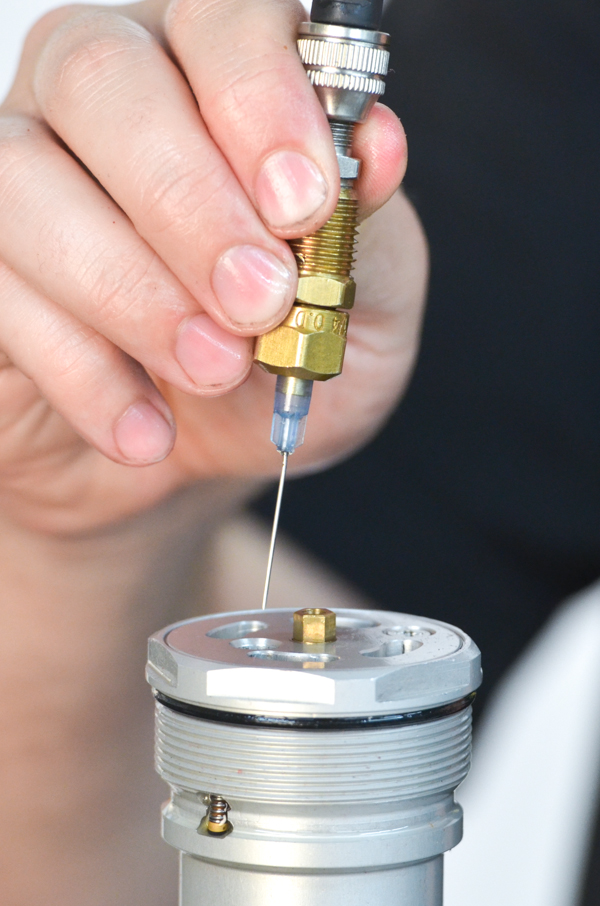
CA9- With the cover screw out insert the Nitrogen Needle (TSNN 01) and...

CA10- Pressurize to factory recommended setting. Usually this is about 17.5 psi.

CA11- Reinstall the Nitrogen Cover Screw.

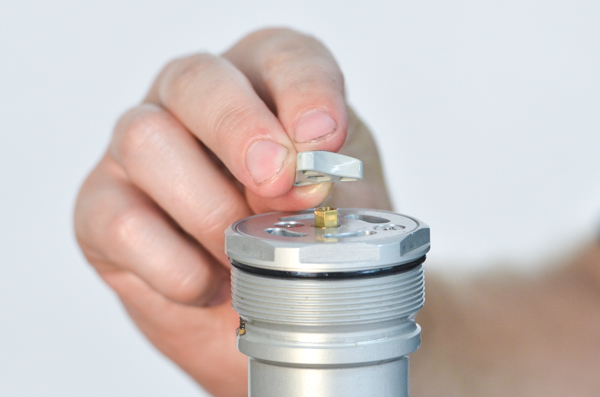
CA12- Install the Compression Adjusting Knob.

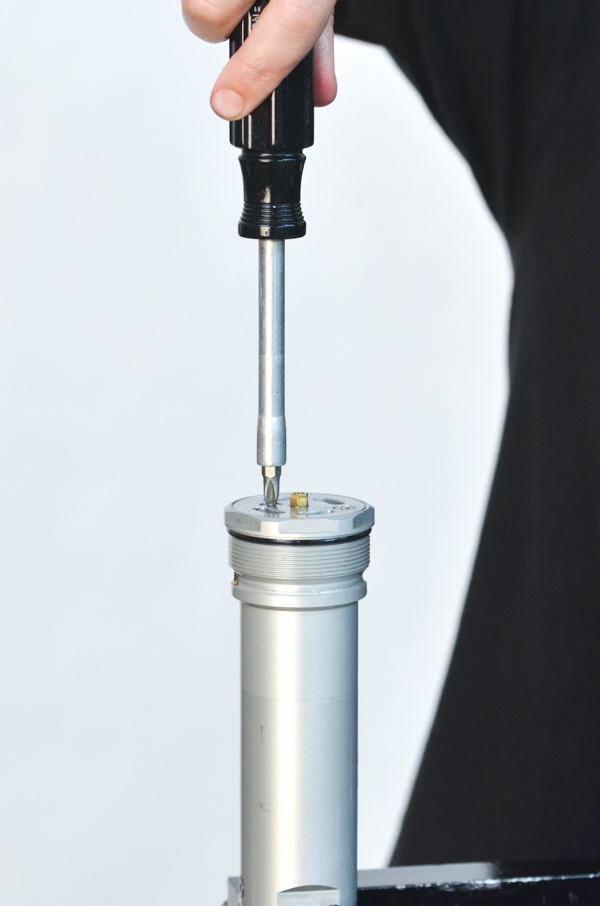
 CA13- Install the flat head screw.

CA14- Put the Jam nut on the end of the damping rod.
Check for proper assembly by compressing the fork and allowing it to extend. It should extend all the way. If it does not you may have a damaged damping rod or too little oil or pressure.


 CA15- TA-DAAAAA!!!!
The rest is basically the same as most other Twin Chamber forks.
►Click here for general rebuild instructions. Fork Gold Valve Installation and Fork Rebuild - Twin Chamber
RT_E2_Logo

951.279.6655

info@racetech.com

1501 Pomona Rd. Suite 101
Corona, CA 92878

STOP! Include Service Request Form when shipping components to Race Tech.

twitter link facebook link instagram link

© 2025 Race Tech. All Rights Reserved

  • Downloads
  • Dealer Application
  • Policies
  • Cookie Policy (EU)
Race Tech
We Respect Your Privacy
To provide the best experiences, we use technologies like cookies to store and/or access device information. Consenting to these technologies will allow us to process data such as browsing behavior or unique IDs on this site. Not consenting or withdrawing consent, may adversely affect certain features and functions.
Functional Always active
The technical storage or access is strictly necessary for the legitimate purpose of enabling the use of a specific service explicitly requested by the subscriber or user, or for the sole purpose of carrying out the transmission of a communication over an electronic communications network.
Preferences
The technical storage or access is necessary for the legitimate purpose of storing preferences that are not requested by the subscriber or user.
Statistics
The technical storage or access that is used exclusively for statistical purposes. The technical storage or access that is used exclusively for anonymous statistical purposes. Without a subpoena, voluntary compliance on the part of your Internet Service Provider, or additional records from a third party, information stored or retrieved for this purpose alone cannot usually be used to identify you.
Marketing
The technical storage or access is required to create user profiles to send advertising, or to track the user on a website or across several websites for similar marketing purposes.
Manage options Manage services Manage {vendor_count} vendors Read more about these purposes
View preferences
{title} {title} {title}
Scroll To Top