Skip to content
RT_E2_Logo

SUSPENSION & ENGINES

  • SEARCHES
    • Product Search
    • DVS Valving Search
    • Spring Rate Search
    • TNK Fork Tube Search
    • Instructions Search
    • Basic Setup Search
    • Engine Search
  • PRODUCTS
    • Suspension
    • Engines
    • Lubricants
    • Tools
      • Fork Tools
      • Shop Tools
      • Shock Tools
      • Dyno Mounts – CTW and Roehrig
      • Engine Tools
    • RT Merch
    • Stickers-Banners
    • Suspension Bible
    • Vintage (pre-2000)
  • SERVICES
    • Suspension
    • Engines
    • Brake Arcing
    • Race Tech Centers
  • ABOUT
    • About Race Tech
    • Contact Us
    • RT Policies
    • Rider Support
  • RESOURCES
    • Instructions
    • Service Request Forms
    • Shipping
    • Contact Us
    • Suspension Bible
    • Mental Edge Video
    • Seminars
    • Downloads
  • LOGIN
  • CART
PRODUCT SEARCH
DVS VALVING SEARCH
SPRING RATE SEARCH
ENGINE SEARCH

Fork Cap Installation - Street

and a few Dirt Bikes (XR400, CR85 & RM85)
or
"How to Make the Adjusters Have the Right Amount of Clicks"
Also includes How to Use Standard and Wall-Mounted Fork Spring Compressors


There are two basic types of adjusting screws on street bike fork caps:

1) One that stops when you turn it in and

2) one that doesn't stop when you turn it in.


To see which type you have you will need to have the cap off the damping rod. Back out the adjusting screw (counterclockwise) all the way until it stops. Attempt to screw it in 6 turns, (count turns as not all caps have clicks). If it stopped turning at 4 or 5 turns you have the type where the adjusting screw stops. If you are still turning and a tiny ball bearing and spring fall out, you've gone way too far. If this happens look in the waste oil pan you have sitting under the bench in the corner as that is where most things you drop end up.

With both types of caps the procedure is almost the same. 

Click on the images to enlarge.


SUPPLIES


USF-05 Fork Oil - extremely slippery
Contact Cleaner - or other good, clean solvent
Fork Springs (likely - check the Product Search for rate recommendations)

TOOLS
TFSC 01 Portable Fork Spring Compressor -
 or
TFSC 02 Foot Operated Fork Spring Compressor -
TMVJ 065 Vise Jaws - handy but not required -
TFBT 02S Bleeding Tool -

HOW TO CREATE THE CORRECT NUMBER OF CLICKS
 
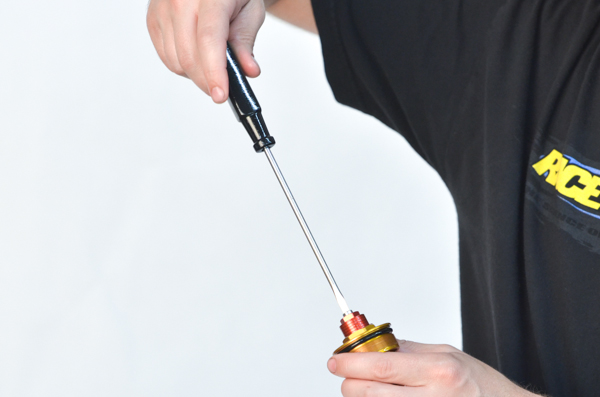
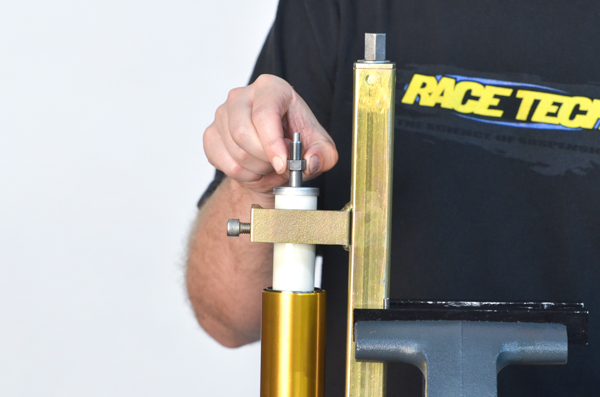
FA19- Make sure the Rebound Adjusting Screw is backed out all the way then screw it in 20 clicks. This step is important in setting the fork cap height as well as the proper number of clicks of adjustment.
 
If there are no "clicks" back out the Adjusting Screw all the way then turn it in 5 turns.
 

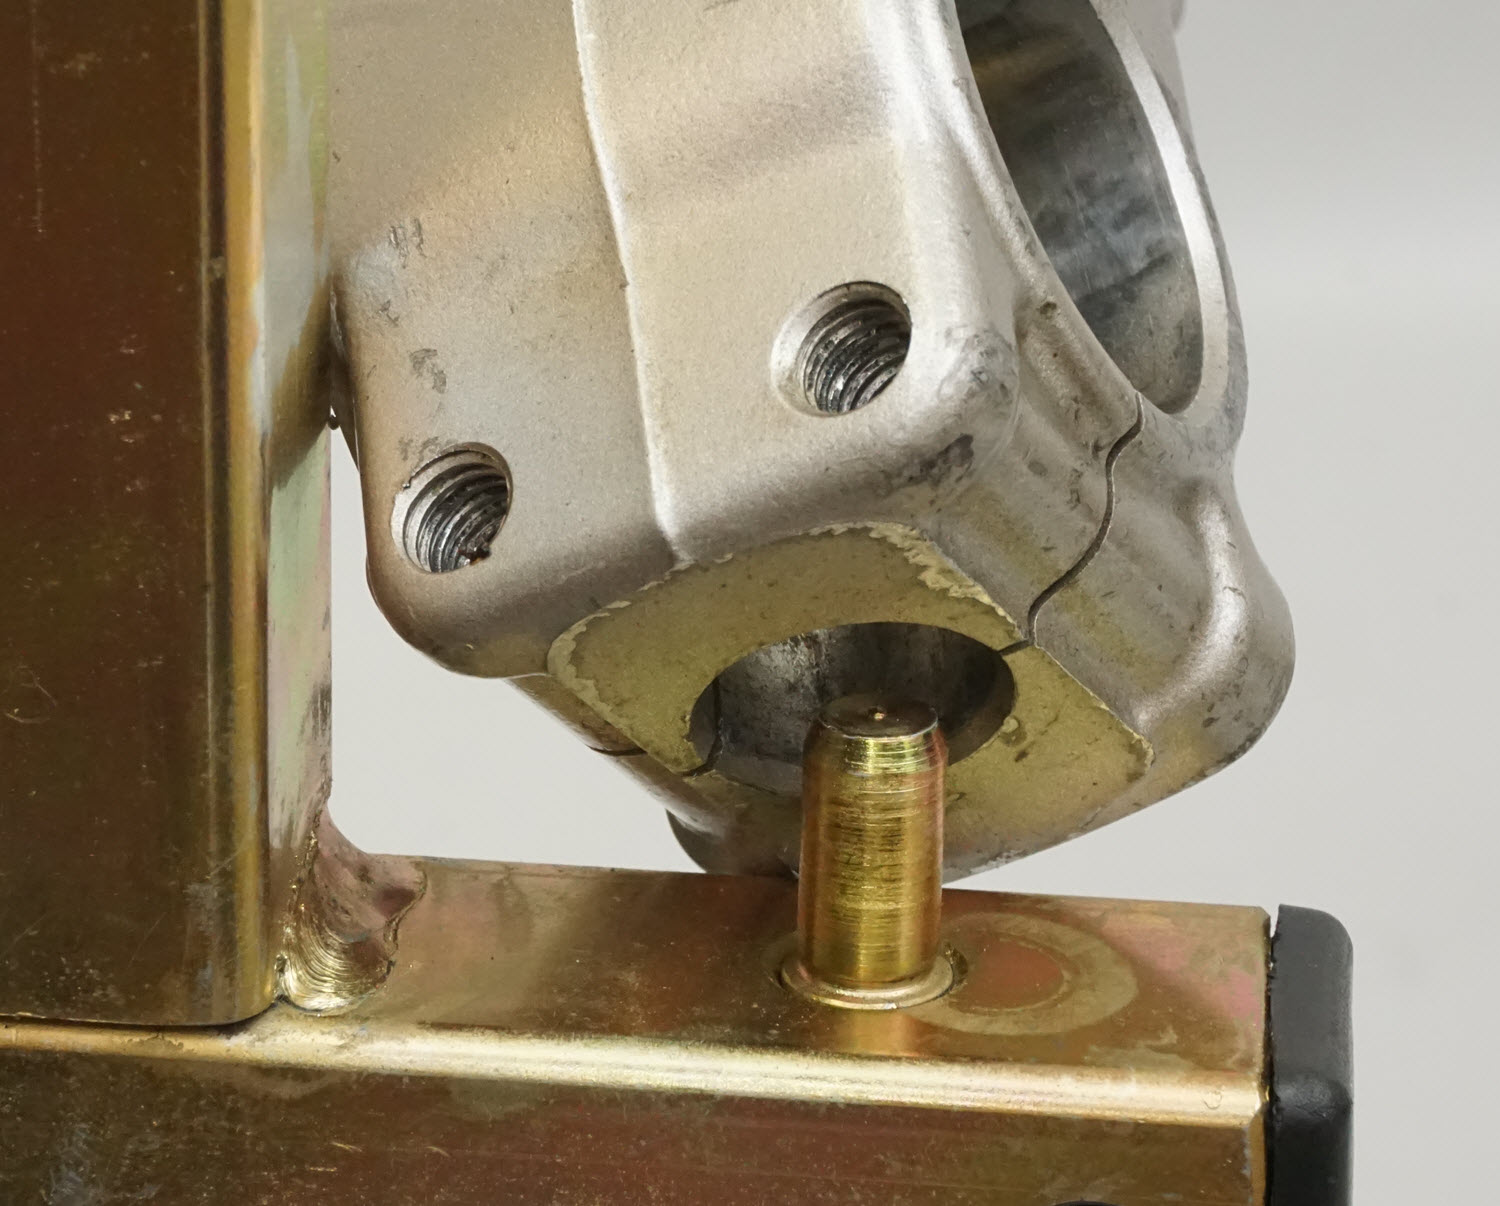
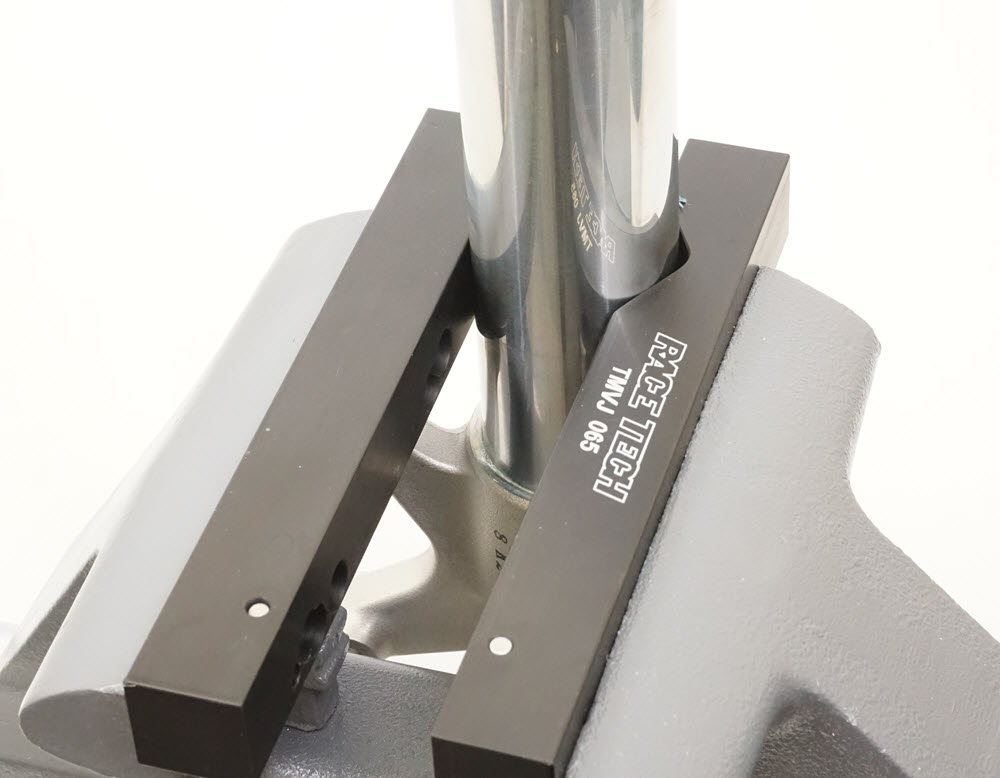
FA20A - Mount the fork leg in the Spring Compressor. You can use either the Standard TFSC 01 Spring Compressor or the Wall Mounted version TFSC 02.

The Pin on the Foot goes into the hole in the bottom of the fork.

The Fork Spring Spacer has two holes in it near the top. Put the pins of the Spring Compressor into the holes and tighten the adjuster screw until both pins are fully captured by the hole.


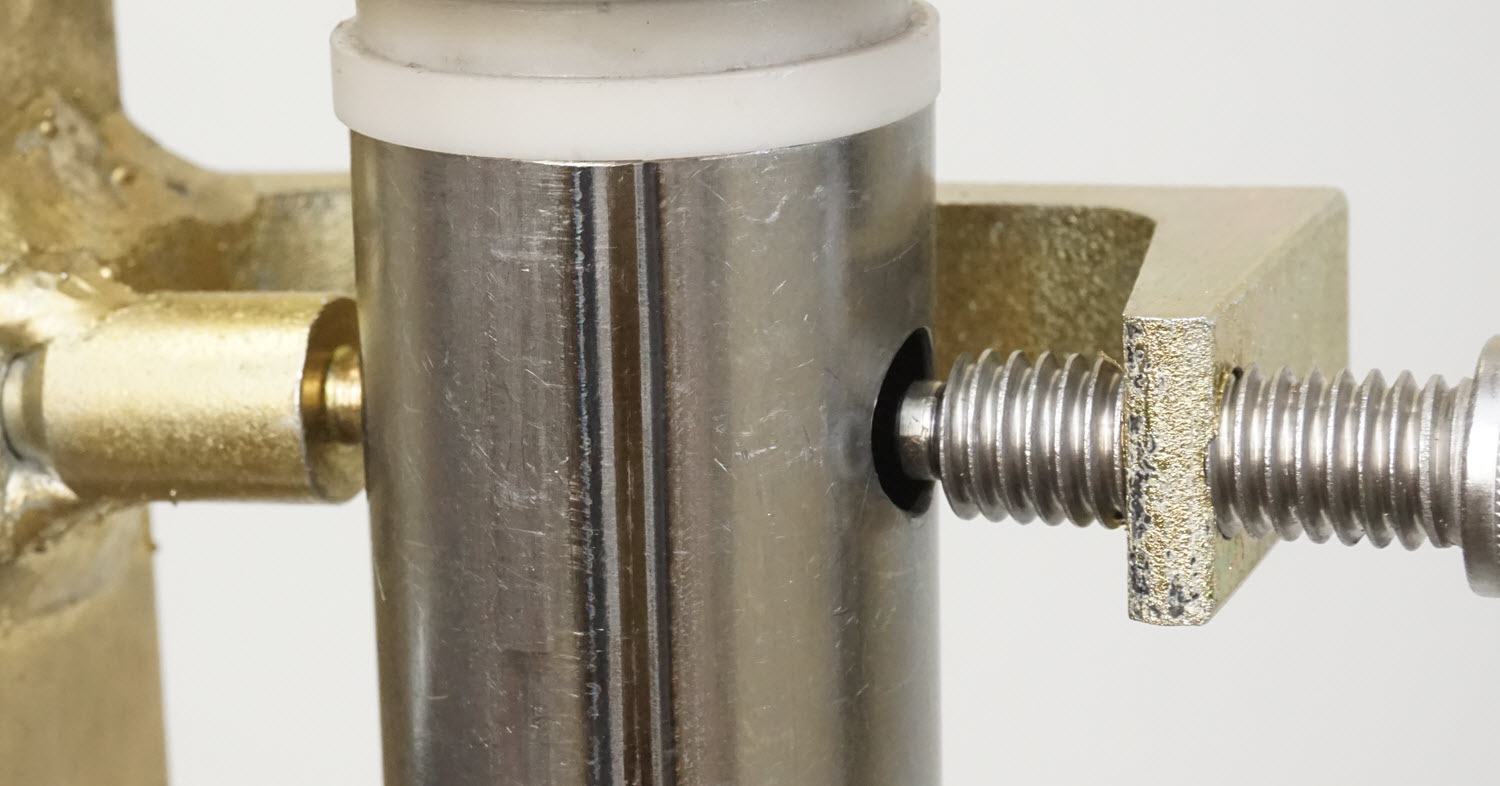
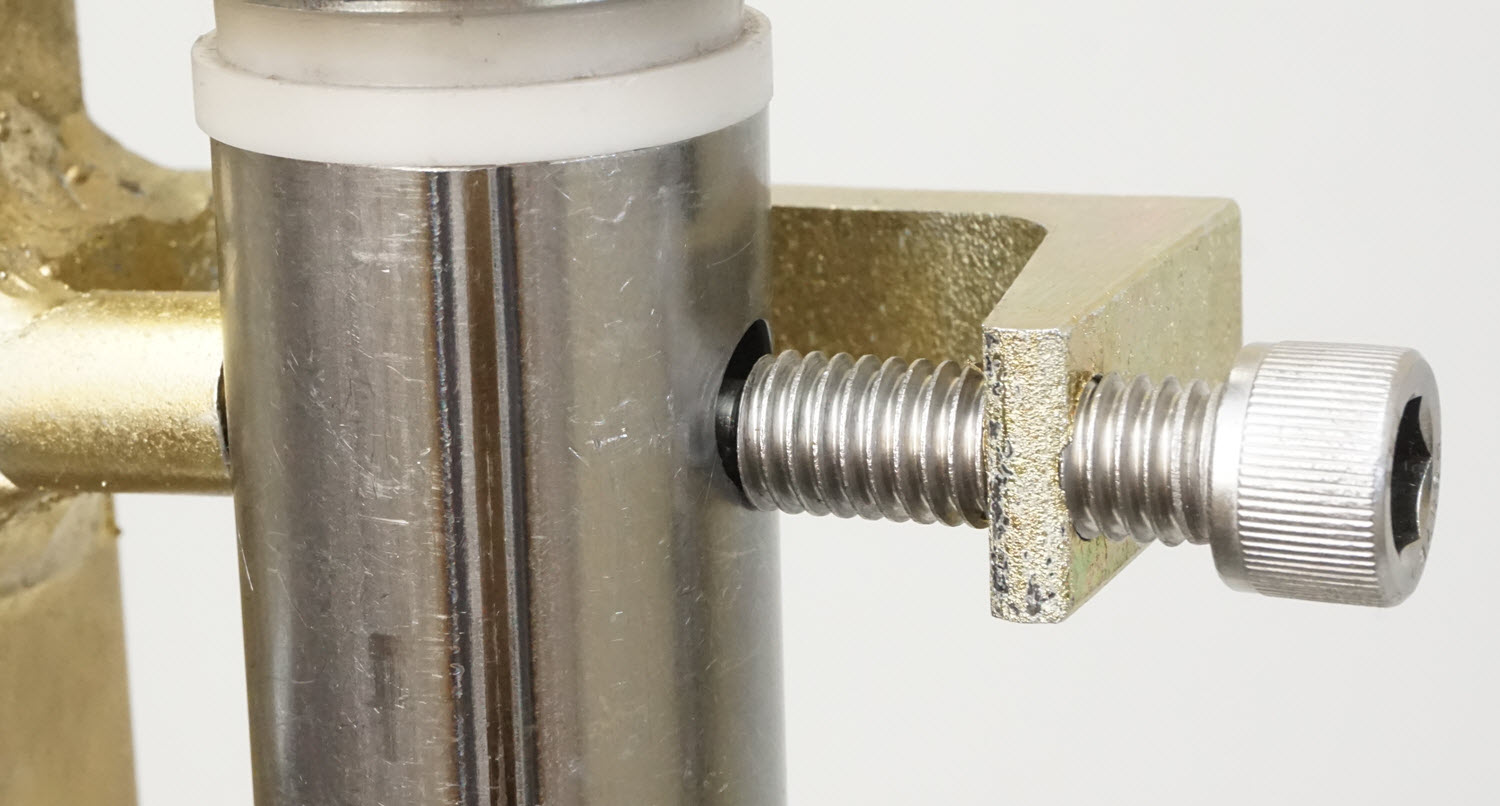
FA20- This is TFSC 01 Standard Spring Compressor. Tighten the Spring Compressor but make sure you stop before the tool hits the top of the fork tube.


Some people have tightened it so hard it breaks the tool! Please don't do this.


Tightening the tool is best accomplished with an electric drill with a socket or a speed handle.


Do not use an impact or it will destroy the tool.


TFBT 02S Bleed Tool keeps everything lined up.

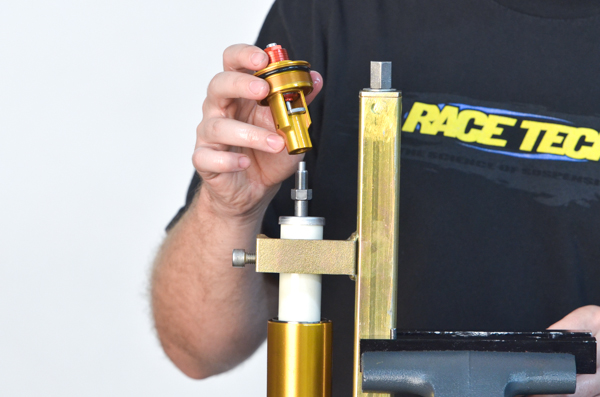
FA21- Once the fork is compressed enough, extend the damping rod and remove the Bleeding Tool. 
 
Check that the Jam Nut is on all the way. This makes sure it is out of the way for now.

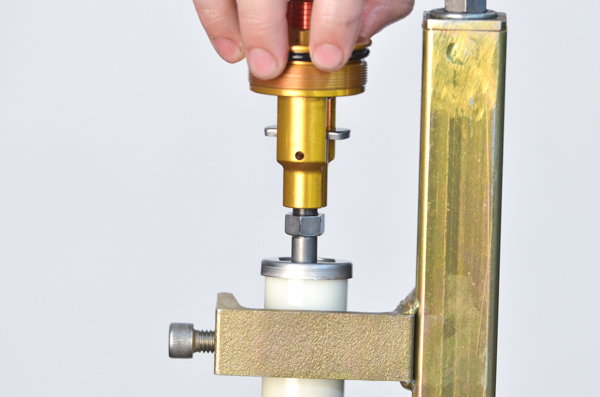
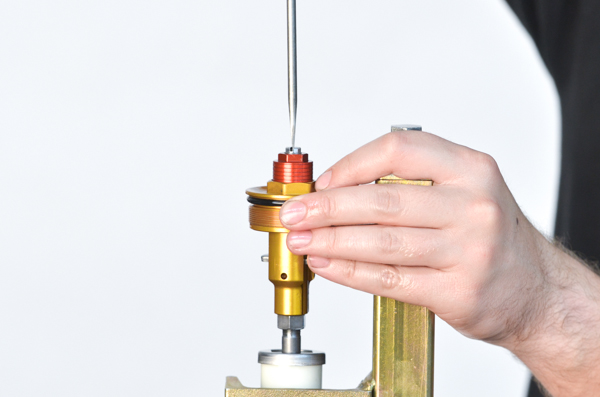
FA22- Install the Fork Cap. Make sure the Fork Spring Preload Adjuster is backed out all the way.

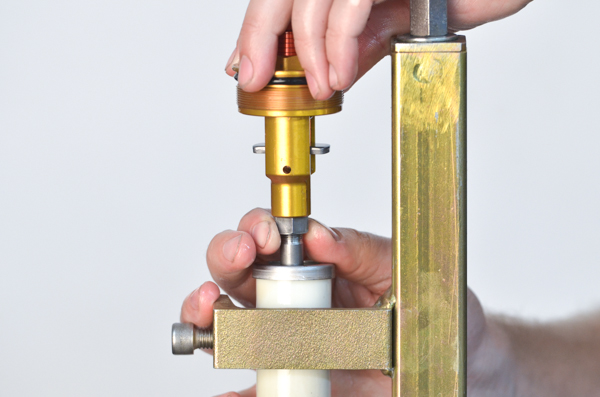
FA23- Screw it down until it gently seats the rebound needle.
 
When the Cap is being screwed on to the Damping Rod the Rebound Adjuster Screw will eventually contact the Rebound Adjuster Rod. As you continue screwing the Cap on, the Rebound Needle will eventually contact the Seat and stop.
 
DON'T FORCE IT!!! If you force it too tightly it will jam the Needle into the Seat and damage the seat... so be gentle.

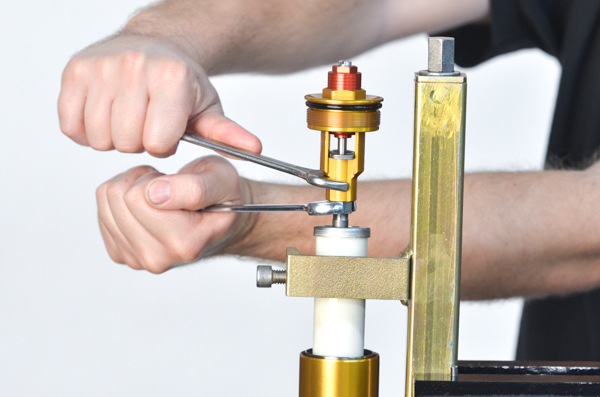
FA24- Bring the jam nut up against the fork cap.

FA25- Back out the adjuster a few clicks to give the Needle clearance from the Seat while you...

FA26- tighten the Jam Nut.
 
Check the number of Rebound Adjuster clicks that are available. There should be close to 20 clicks (or 5 turns) as that is what the procedure we use creates. If it is more than 2 clicks different than that remove the cap and repeat the procedure.

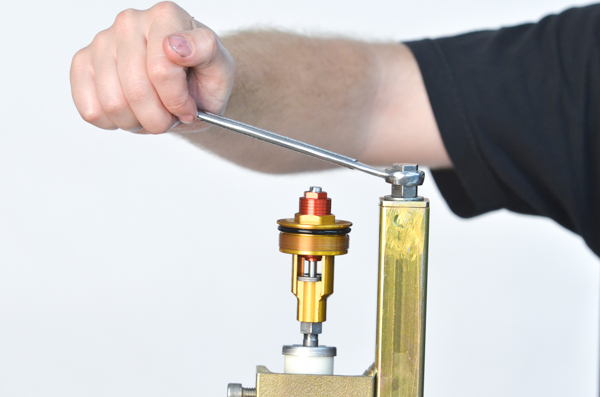
FA27- Unscrew the Fork Spring Compressor Tool, remove the fork leg from the tool, and tighten the Cap.
 
Set all your adjusters, mount the forks on the bike, and enjoy.

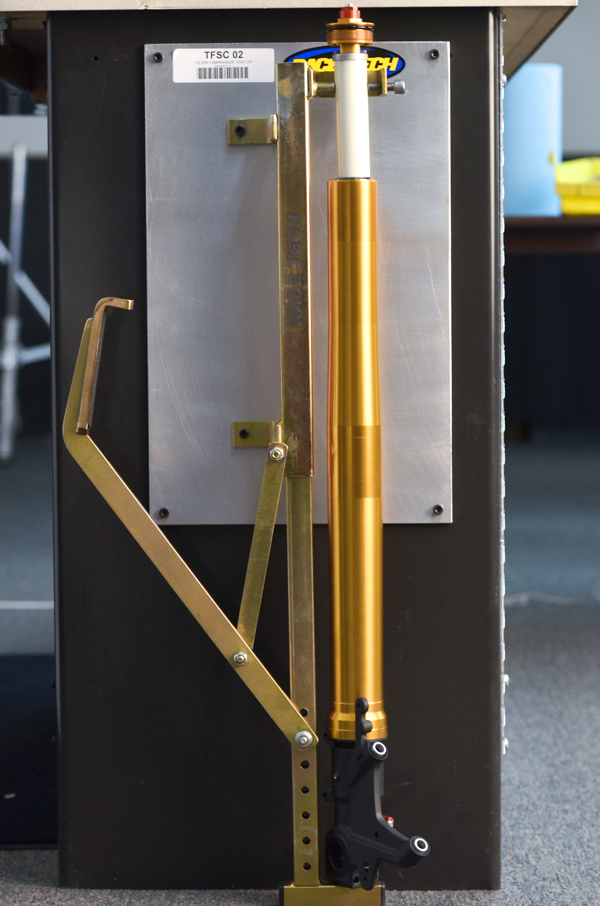
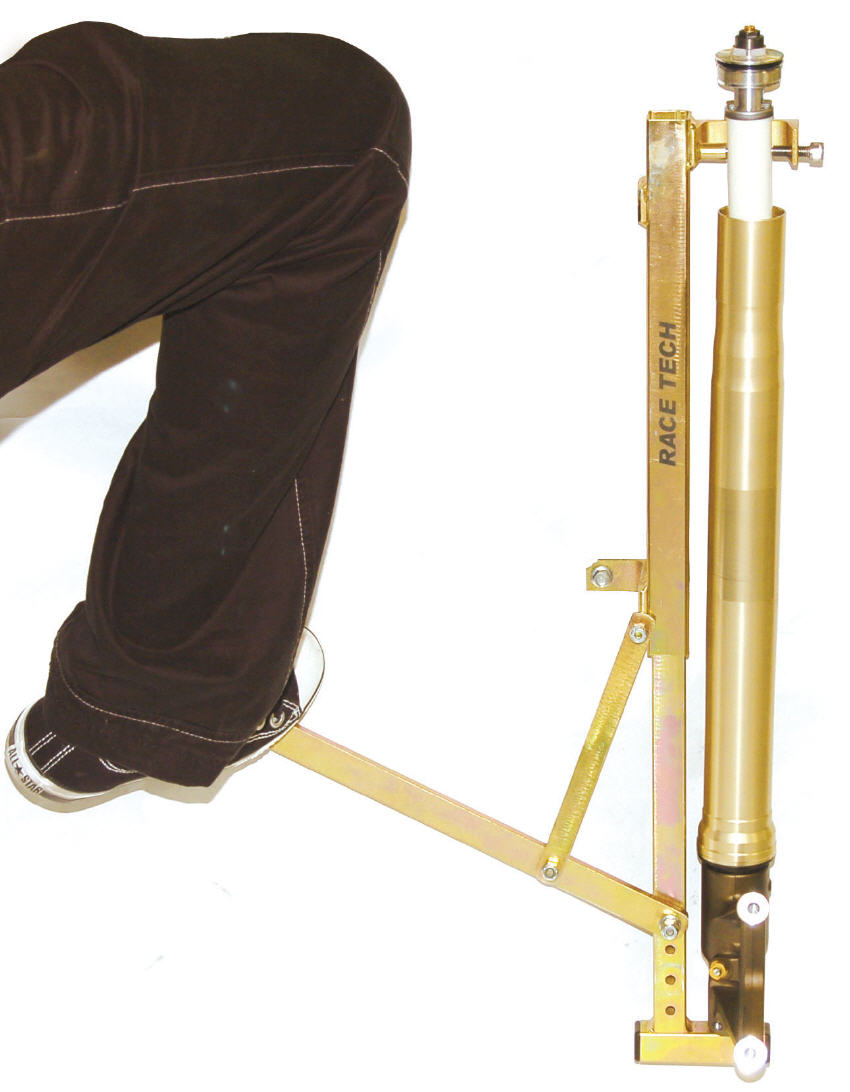
FA28- TFSC 02 Wall Mounted Spring Compressor
 
Place the fork in a RT Fork Spring Compressor (TFSC 02) with the tool's top pins in the holes in the spring spacer and the locating pin in the bottom of the fork.

FA29 - Compress the fork spring.
 
This pic is a little awkward. Normally you will stand in front of the tool and put your foot at right angle to the lever.
 
The rest is the same as TFSC01.
RT_E2_Logo

951.279.6655

info@racetech.com

1501 Pomona Rd. Suite 101
Corona, CA 92878

STOP! Include Service Request Form when shipping components to Race Tech.

twitter link facebook link instagram link

© 2025 Race Tech. All Rights Reserved

  • Downloads
  • Dealer Application
  • Policies
  • Cookie Policy (EU)
Race Tech
We Respect Your Privacy
To provide the best experiences, we use technologies like cookies to store and/or access device information. Consenting to these technologies will allow us to process data such as browsing behavior or unique IDs on this site. Not consenting or withdrawing consent, may adversely affect certain features and functions.
Functional Always active
The technical storage or access is strictly necessary for the legitimate purpose of enabling the use of a specific service explicitly requested by the subscriber or user, or for the sole purpose of carrying out the transmission of a communication over an electronic communications network.
Preferences
The technical storage or access is necessary for the legitimate purpose of storing preferences that are not requested by the subscriber or user.
Statistics
The technical storage or access that is used exclusively for statistical purposes. The technical storage or access that is used exclusively for anonymous statistical purposes. Without a subpoena, voluntary compliance on the part of your Internet Service Provider, or additional records from a third party, information stored or retrieved for this purpose alone cannot usually be used to identify you.
Marketing
The technical storage or access is required to create user profiles to send advertising, or to track the user on a website or across several websites for similar marketing purposes.
Manage options Manage services Manage {vendor_count} vendors Read more about these purposes
View preferences
{title} {title} {title}
Scroll To Top