Type 6 Adjustable Rebound Damping - General |
||
 |
Forks with external rebound adjusters require special treatment which involves disabling the external adjustment. After this procedure you will no longer have external rebound adjustment.
There are two types: Type 1) DOES NOT REQUIRE BRAZING - ZX-11 Type 2) REQUIRES BRAZING - most other models If you are not experienced with this work STOP!!! DO NOT PROCEED. SEEK OUT A QUALIFIED SUSPENSION TECHNICIAN. |
|
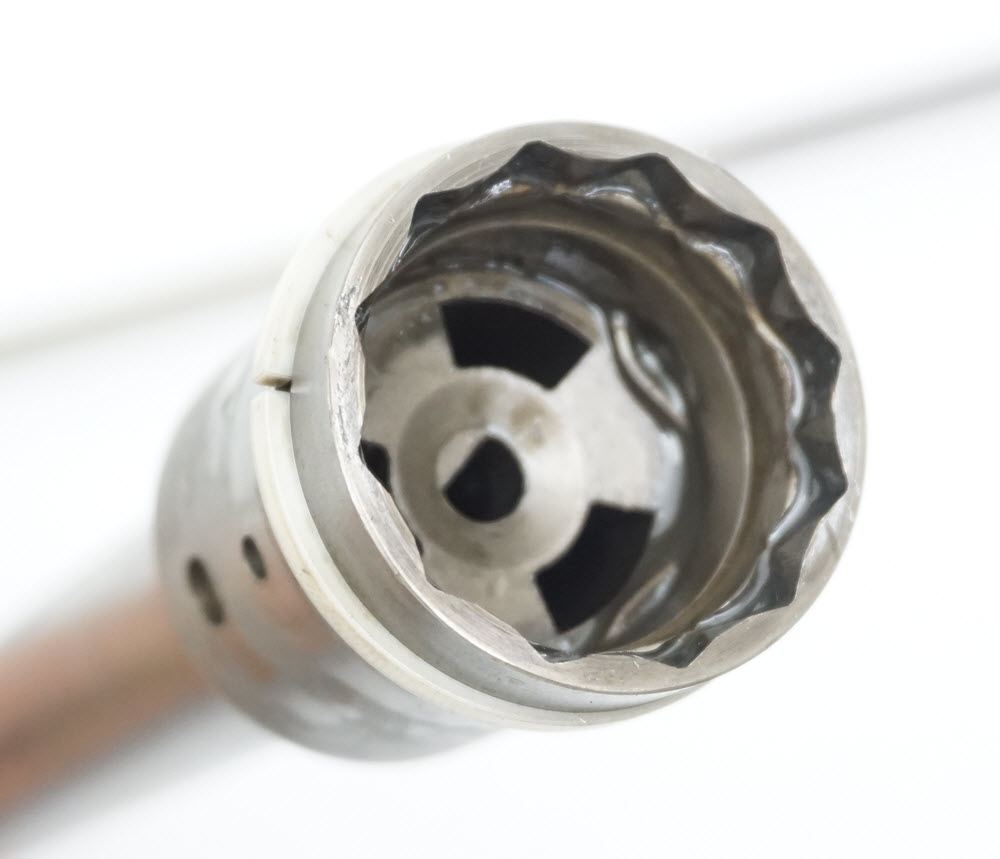
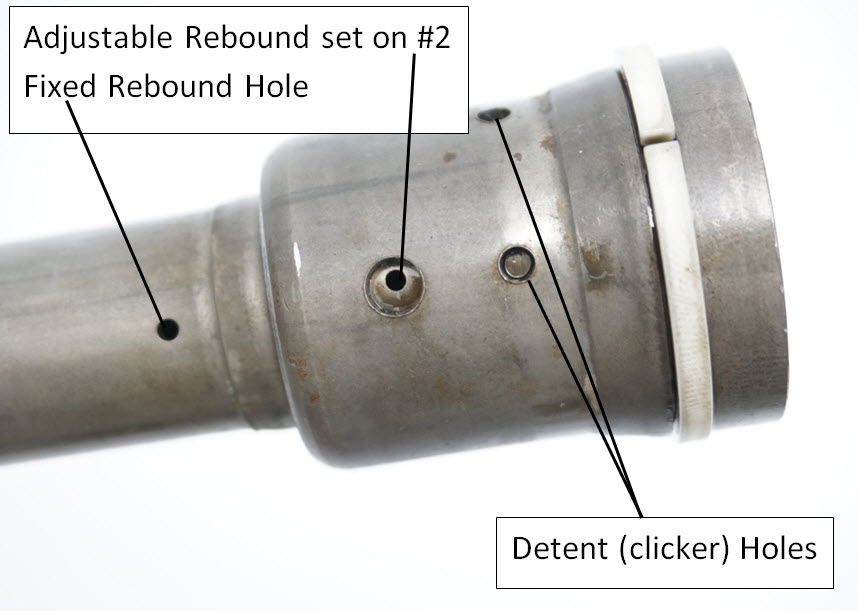
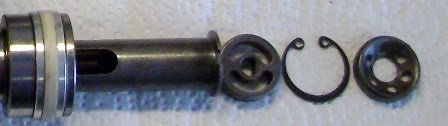
Stock - Adjuster rod in cap, rebound adjuster set to #2
D-shaped adjusting rod interfaces here
Rebound adjustment commonly found in #2 position
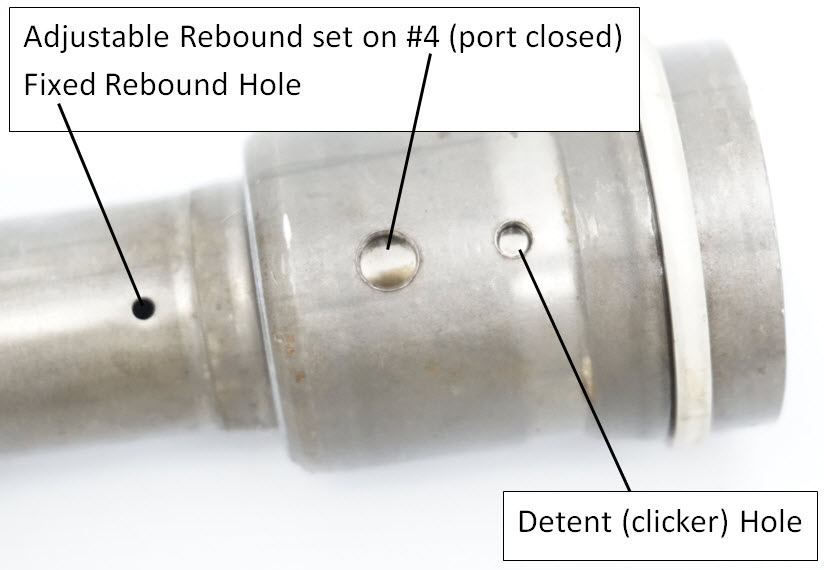
Adjusted to closed #4 position ready for installation
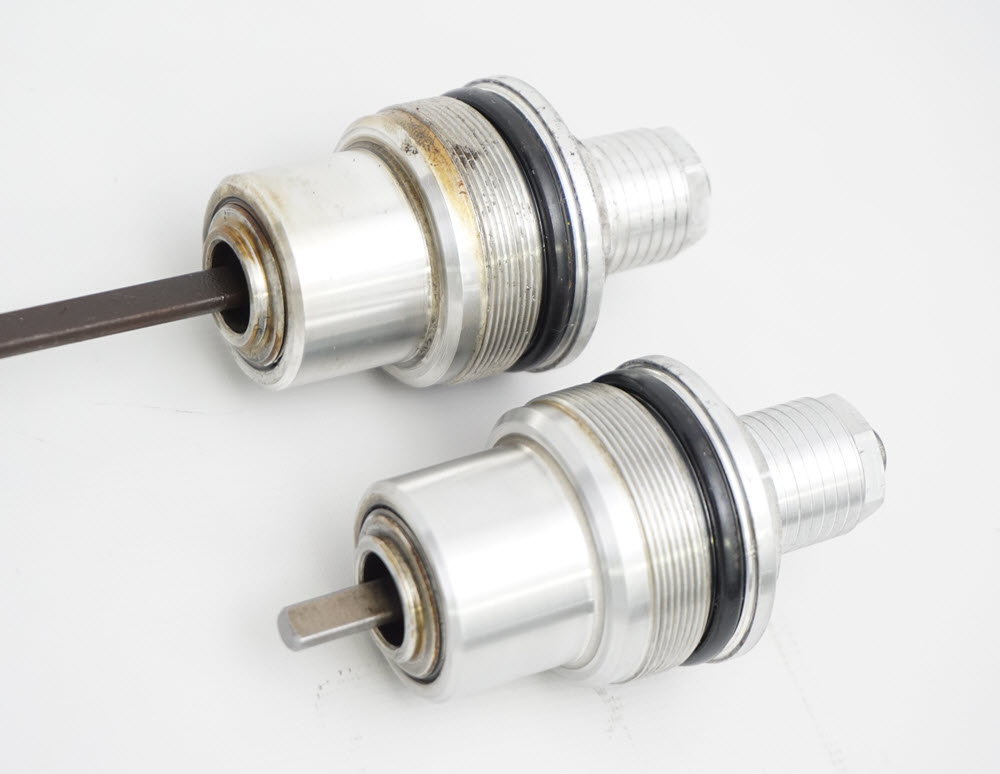
Shorten the D-shaped adjusting rod
Modified assembly ready for installation |
Type 1 – DOES NOT REQUIRE BRAZING - KAWASAKI ZX-11, FJ1100, FJ1200 1This is a very simple modification. Remove the cap. The “D” shaped adjustment rod that is attached to the cap must be removed with a hacksaw. Cut the rod off within 25mm (1 in) from the cap. 2Remove the damping rod from the forks. There is a 4 position adjuster driven in the center of the damping rod with the "D" shaped rod. Position the adjuster so the damping hole is closed. 3Follow the standard installation instructions including drilling the additional compression holes (located at the bottom of the damping rod). |
|
 |
Type 2 – REQUIRES BRAZING - MOST OTHER MODELS
1Remove the damping rods from the fork tubes. 2Disassemble the adjustable rebound mechanism in the top of the damping rod. This is usually operated with a "D" shaped rod connected to the fork cap. The rebound mechanism is usually held into the top of the damping rod with a round wire clip or a standard circlip. 3The “D” shaped adjustment rod attached to the cap must be removed with a hacksaw. Cut the rod off within 25mm (1 in) from the cap. The exact length is not critical. 4The damping rod has extra holes originally used for detent purposes. These must be brazed shut. Once they are brazed they must be filed smooth to the surface of the steel damping rod. Do not file down below the surface or it will decrease rebound damping. The rebound feed hole must also be brazed shut and smoothed down. 5You may want to drill a new rebound hole in the small diameter portion of the damping rod below the head. This is determined by the setting you normally use. For example: if you use the #2 setting, check what size hole is being used when the adjuster is in that position. Use a set of metric or numbered drills and find the corresponding size drill for the rebound hole in the #2 position. Drill a new rebound hole the size you just determined. Locate it 20mm below the head and lightly de-burr the opening. NOTE: If you like the rebound damping best when it is set at another setting, like 1,3 or 4, then drill your new rebound hole to the corresponding size for that adjustment. 6Follow the standard installation instructions. This includes drilling the additional compression holes (located at the bottom of the damping rod). |
|
With the switch to the new racetech website and systems we are requesting each user reset their password in our system. Simply use our forgot password feature on the login page to reset yours.