6.2 KYB 37mmCupped-Top Adjustable Rebound Damping - From the Bottom
|
|
| These forks are pretty unique in that the rebound adjuster knob is on the bottom of the fork instead of the top. The knob is attached to a rod connected to a barrel at the top. The barrel has 4 different size rebound holes that align with an outlet hole in the damping rod. This rebound system works great.
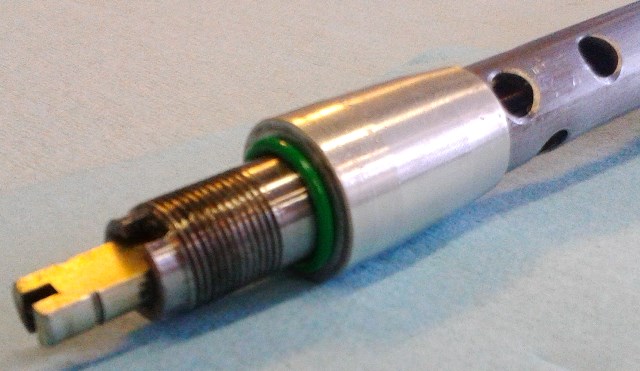
The only modification required is to enlarge and add compression holes at the bottom of the damping rod. The stock damping rod is pictured with the rebound adjuster removed from the damping rod. The top of the rod is to the right. Note - once the damping rod is removed from the fork the adjuster assembly will slide out the top. |
|
|
|
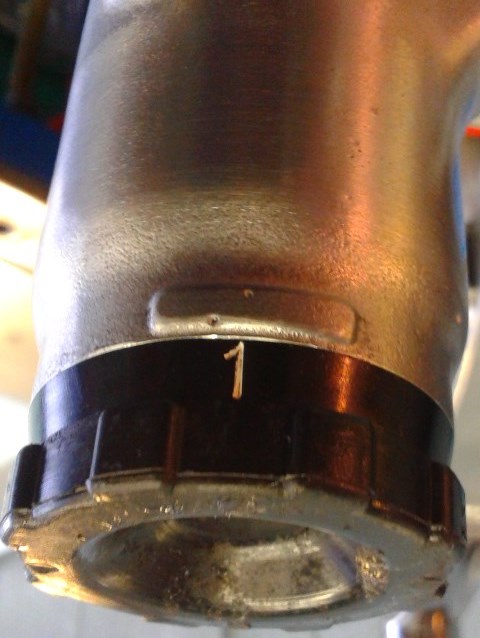
The raised boss on the aluminum slider aligns with number on the knob. Put it on #1.
The rebound adjuster knob is semi-soft plastic. It is retained by a lip that goes into a groove on the fork leg. Gently pull/pry it off. |
|
|
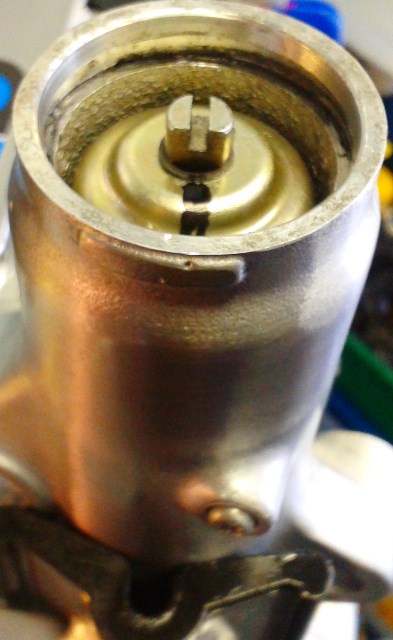
Once the adjuster knob off this area will usually be filled with gunk. Clean it before proceeding. Notice the rod with the slot in it has a flat on it. The flat will be aligned with the raised boss in the #1 position. Put a black line on the housing with a felt tip pen to assist ressembly. Remove the circlip from the D-shaped rod. The gold colored detent mechanism can now be removed. |
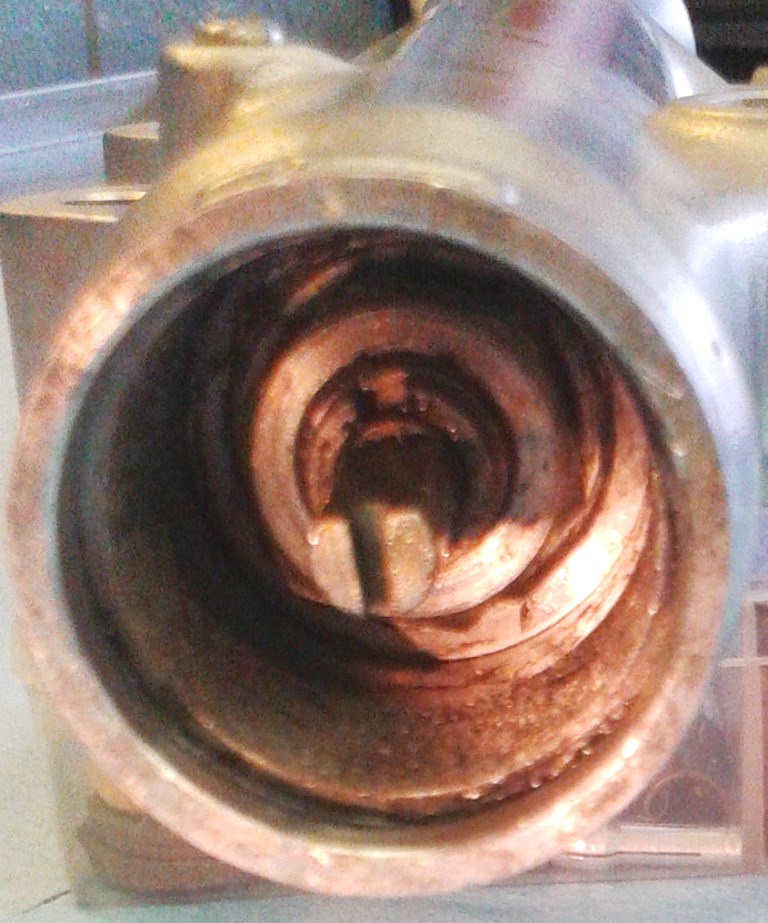 |
Once the gold detent mechanism is removed you can see the 22mm retaining nut and the end of the damping rod. Notice there is a notch in the end of the damping rod that is aligned with the flat on the D-shape rod and the boss on the aluminum slider. This will be important on reassembly. |
|
|
Remove the bottoming cone and slide the damping rod out the top of the fork tube. Remove the top-out spring.
In this picture the rebound adjuster mechanism is installed (it is sticking out the bottom.) Push the adjuster rod out the top of the damping rod. Enlarge the four existing compression holes at the bottom to 7mm. Drill two additional 7mm holes 10mm above the top set at 90 degrees. As shown. Clean and deburr the compression holes inside and out. Inspect and lube the o-ring on the D-shaped rod and reinstall the rebound adjuster rod. As you can see there is a 6mm rebound inlet hole near the top of the damping rod. The flat on the D-shaped adjuster rod aligns with the largest rebound hole (2.3mm) on the adjuster barrel. Align the flat with the notch and the outlet hole. This will align the largest (2.3mm) rebound hole on the barrel with the 6mm inlet hole at the top of the damping rod. If you have removed the piston ring from the damping rod notice that it is directional. The notches go down. |
 |
Place the top-out spring on the damping rod. Install it into the chrome fork tube, Install the bottoming cone and...
Make sure to reinstall the 14x2.0mm o-ring at the bottom of the damping rod underneath the bottoming cone. The o-ring on this rod is green though it doesn't have to be. There is no copper washer. The o-ring on the damping rod and the small one on the adjuster rod seals the bottom. |
|
The damping rod MUST be clocked for proper positioning of the adjuster knob. Suzuki probably has a special tool for this but...
Put a little light grease on the thread. Install the 22mm hex nut finger tight. Rotate the damping rod so that the D-shaped rod and notch in damping rod are facing the center of the boss on the aluminum slider. Tighten the 22mm hex nut. This can be tricky as the damping rod will want to rotate. Re-adjust the damping rod clocking as needed. |
 |
Carefully install the gold detent mechanism. If the detent mechanism catches on the adjuster rod it will push it in. You may have to support it from the top of the fork. When there is enough D-shaped adjuster sticking out to grab onto, pull out on it enough to expose the circlip groove and install the circlip. |
 |
Grease the adjuster knob interface surfaces. Align the #1 with the flat and push it on. |
| Most of the rest of the assembly is standard. See Standard Emulator Installation Instructions.
Consult your DVS Custom Setup Sheet. Adjust the Emulator settings if necessary. Install the Emulator. Back out the preload adjuster on the fork cap. Set the preload on the fork springs by adjusting the preload spacer length. Make sure there is a steel washer between the spring and the spacer. Remove the spring. Install the oil and set the oil level. Install the spring, washer, and spacer. |
|
| There is no o-ring on the fork cap. Make sure the o-ring on the slug under the fork cap is in good shape. This picture shows an extra washer between the spacer and the slug. It is not necessary but perfectly ok. The important thing is to avoid having the spring rest directly on plastic or aluminum.
Install the fork cap. Set the rebound adjuster to the #2 position. Install the forks back on the bike and have fun!
|
|
With the switch to the new racetech website and systems we are requesting each user reset their password in our system. Simply use our forgot password feature on the login page to reset yours.


