Shock Seal Head Rebuild
|
|
|
|
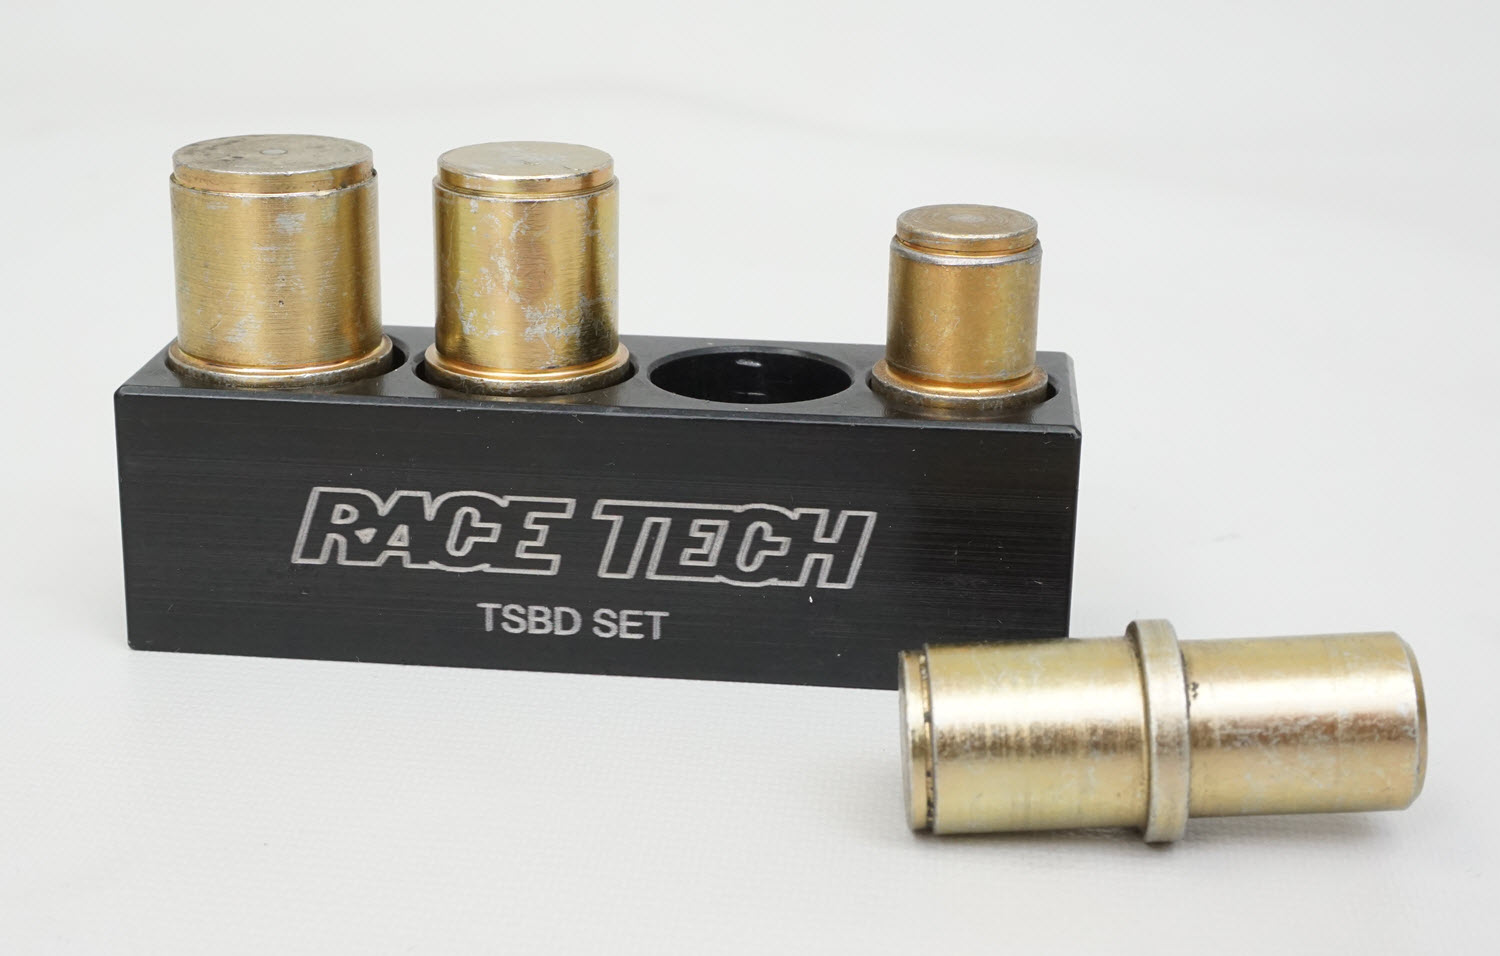
TOOLS REQUIRED TSBD SET - Bushing Drivers
TMVJ 065 - Vise Jaws (mounted on a vise - of course) |
|
|
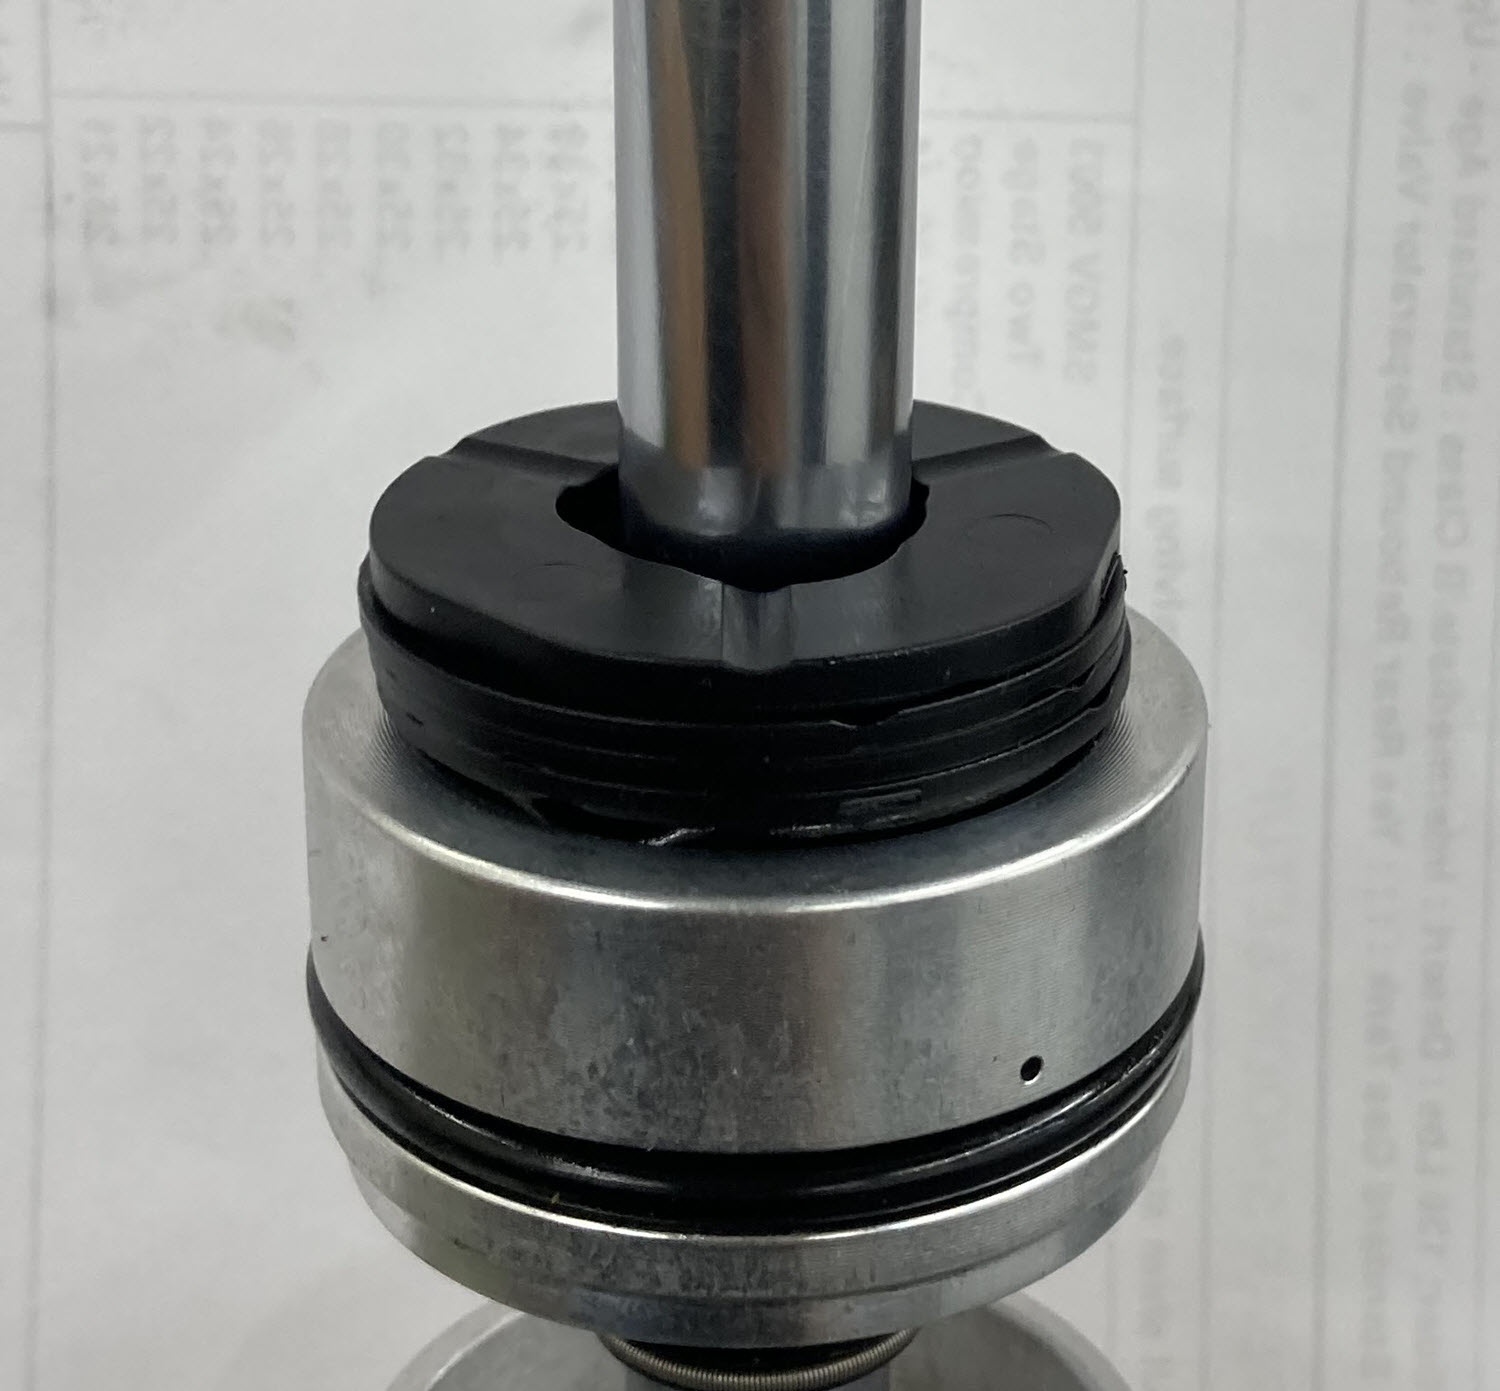
SH1 - This is only required if replacing a seal or shaft bushing. Shock Seals can last a long time but it is a good practice to replace both the Shaft Seal and Dust Seal together if they are over a year old.
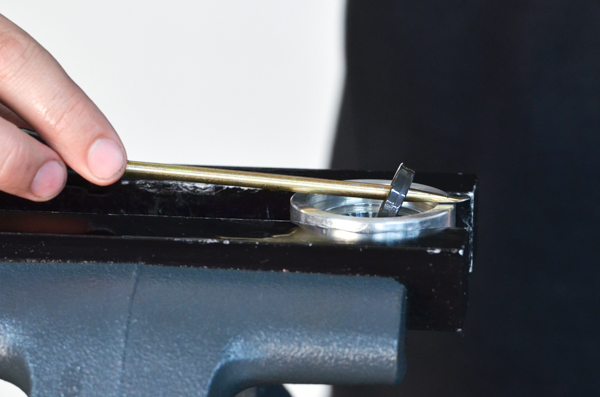
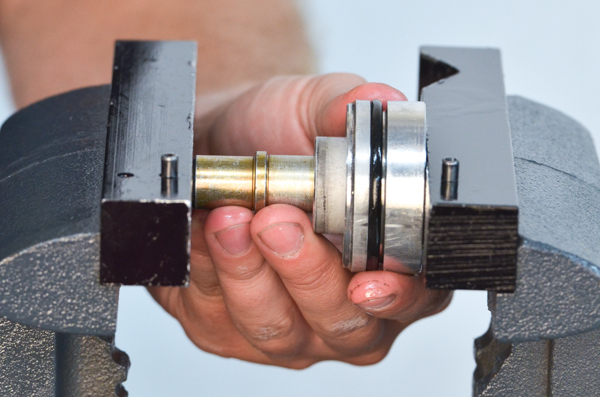
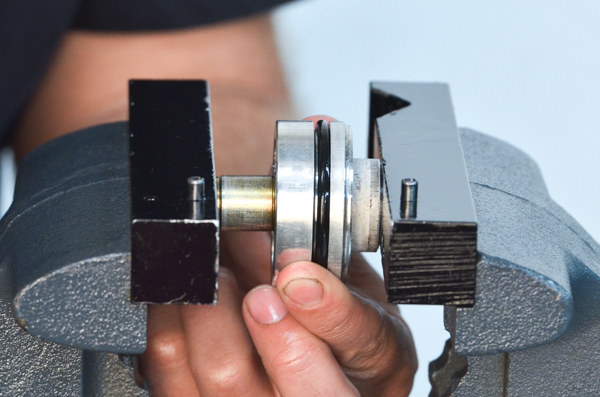
This seal head is clamped in the "V" of a set of TMVJ 065 Vise Jaws.
Pry the rubber top-out bumper out of it's groove with a clip tool being careful not to damage anything.
|
|
|
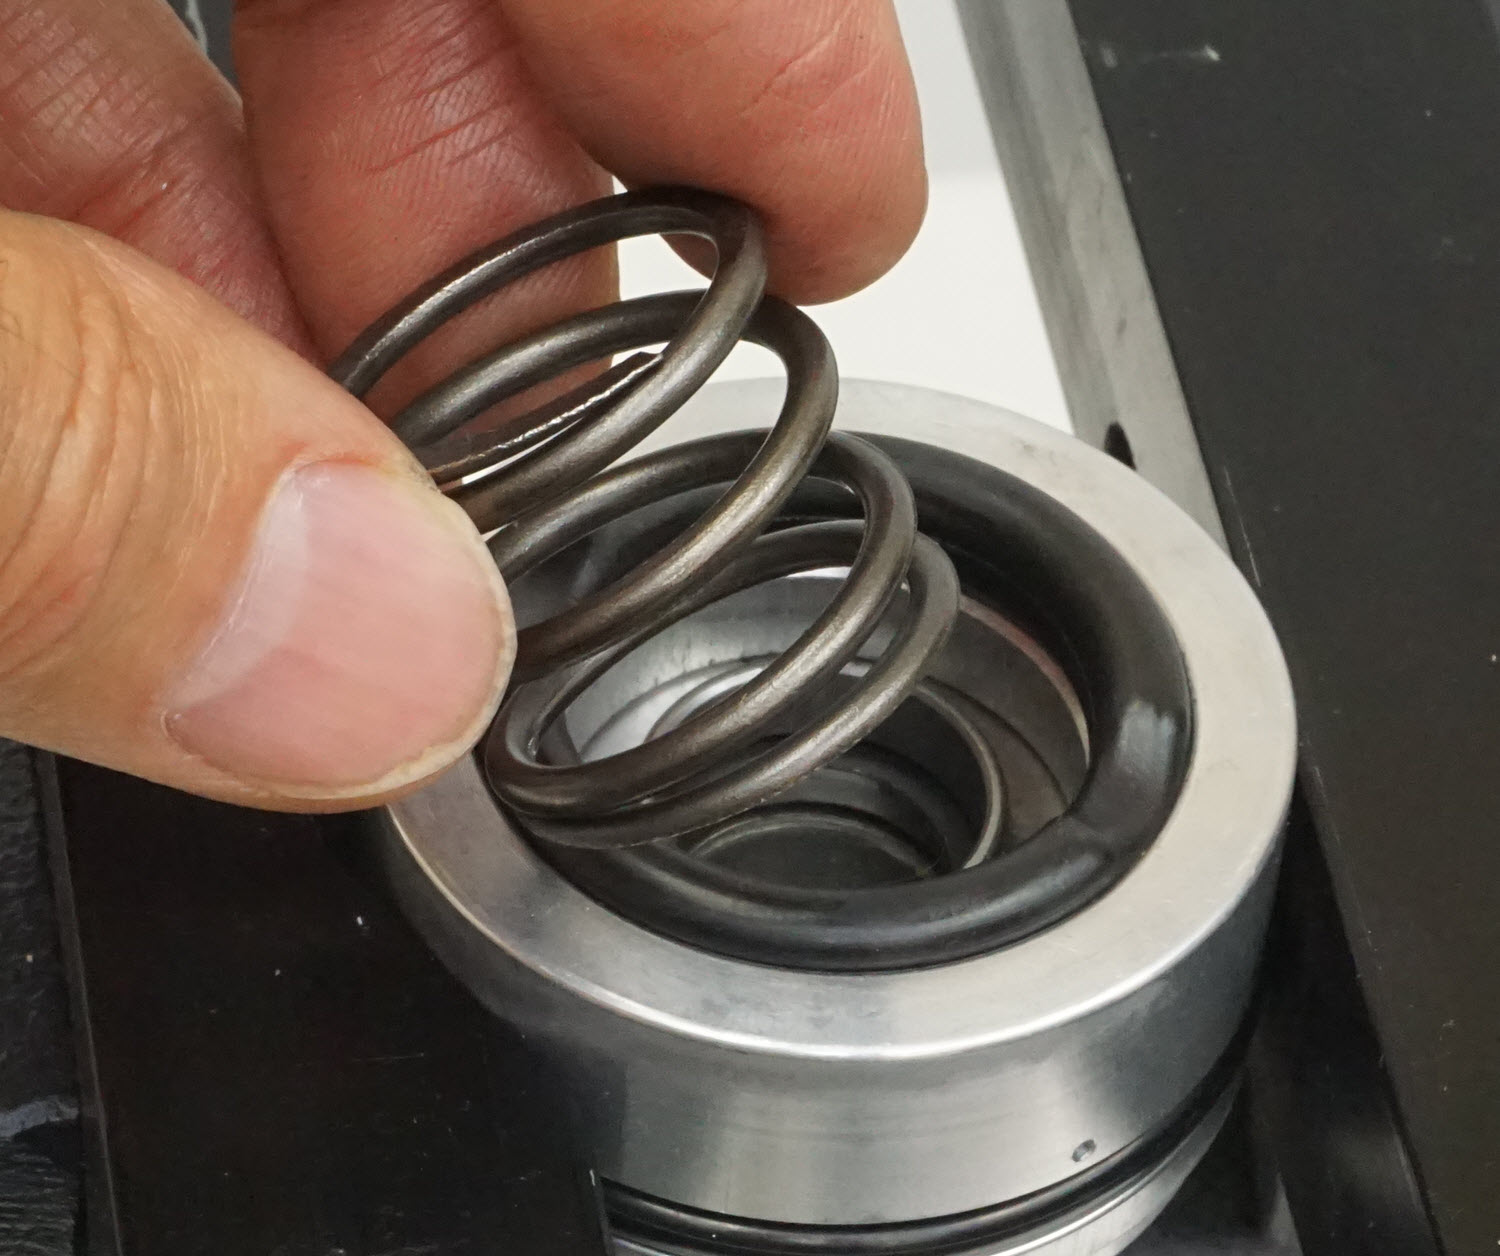
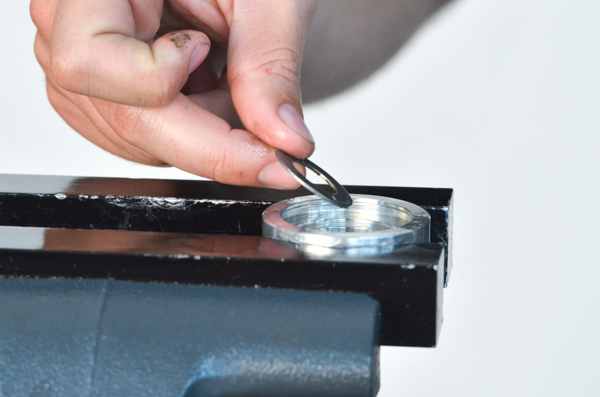
SH1A - Some Seal Heads have a Top-out Spring. This can be removed by pulling/prying it off.
|
|
|
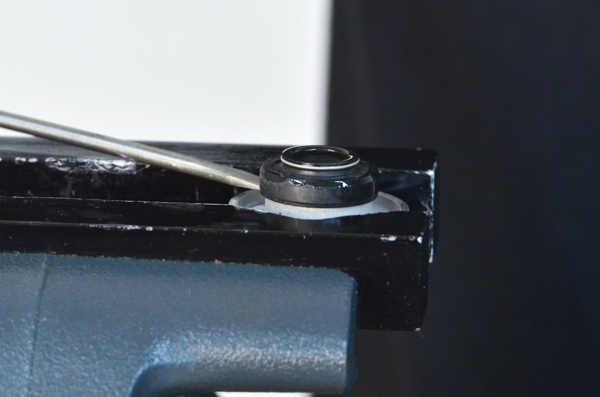
SH2 - It is common for KYBs to have the flanged washer shown. Most modern Showas do not have the middle flanged washer. Some have a top-out spring in addition to the rubber bumper.
|
|
|
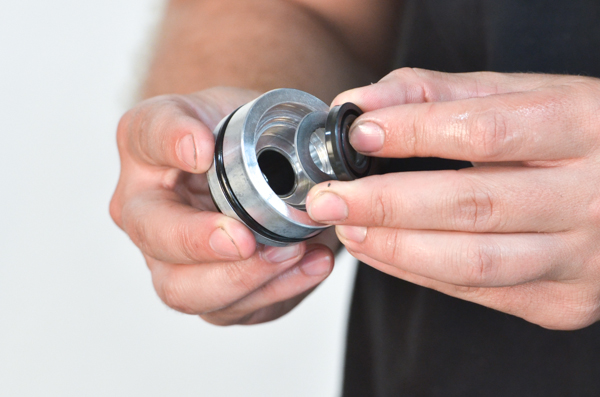
SH3 - Remove the shock shaft oil seal being careful not to scratch the walls of the sealing surface. Pay attention to the direction the seal is installed (for assembly). The sealing edge goes inward to the shock.
|
|
|
SH4 - Remove the seal washer (if used).
|
|
|
SH5 - Flip over the seal head and pry off the dust seal with a flat blade screwdriver. Use the edge of the vise jaws as a fulcrum.
|
|
|
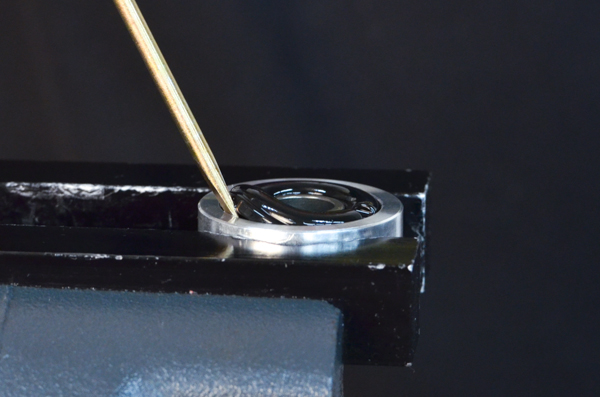
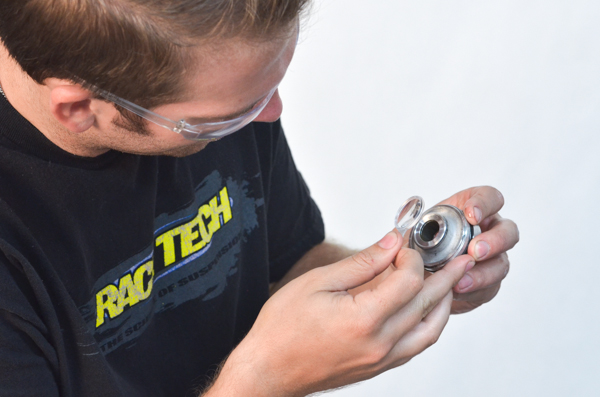
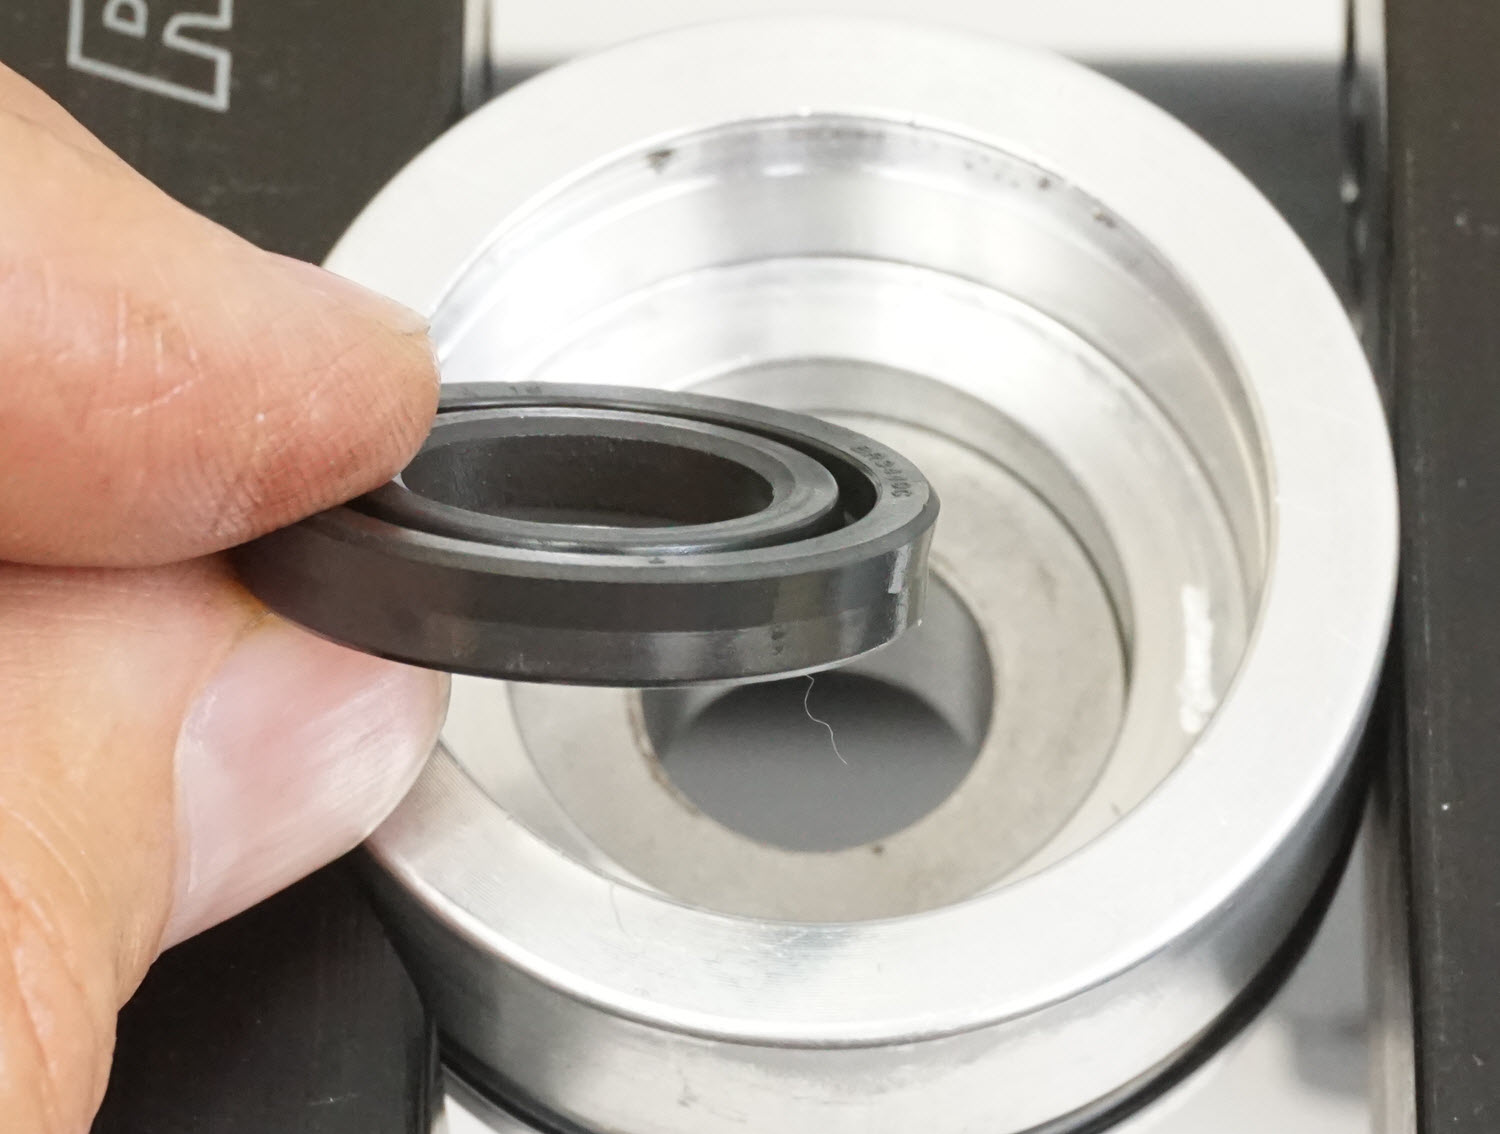
SH6 - Inspect the shaft bushing and seal head O-ring. A magnifying glass and plenty of light helps here. Replace components that are damaged or worn.
|
|
|
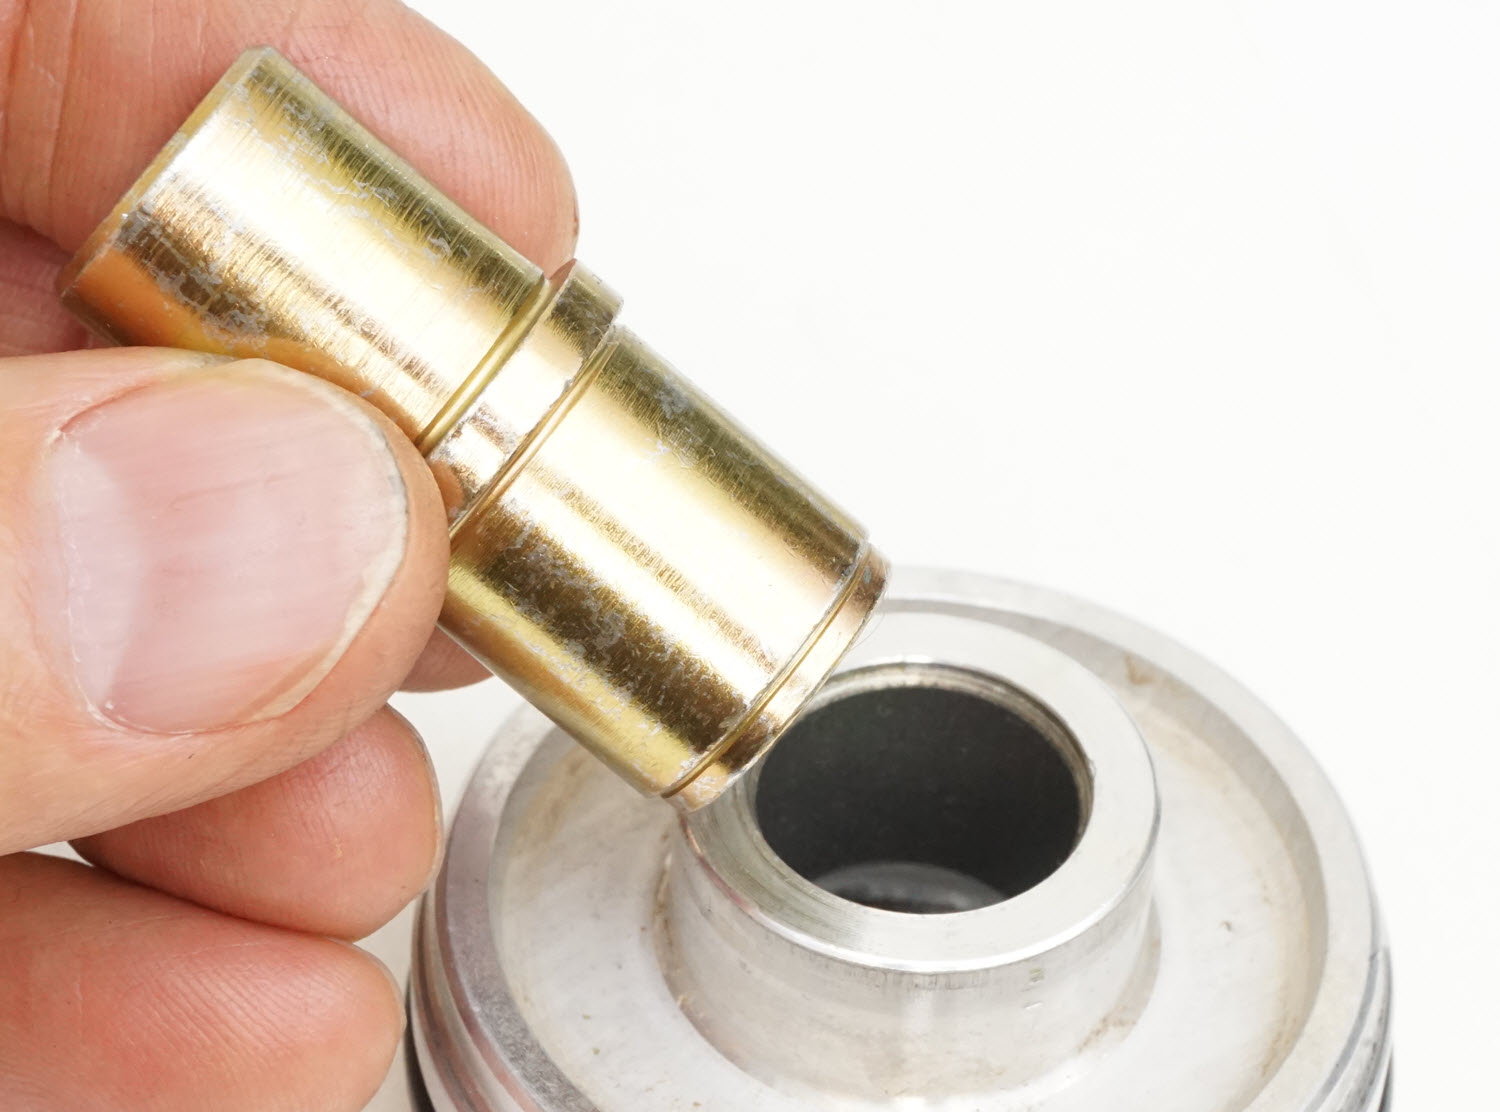
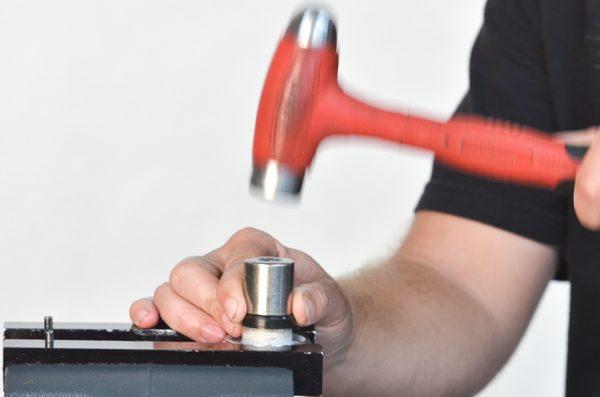
SH7 - To replace the bushing use a properly sized Bushing Driver (TPSD Series) and a vice as a press.
|
|
|
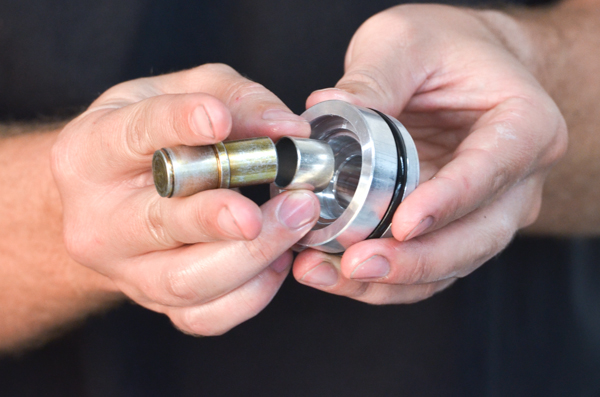
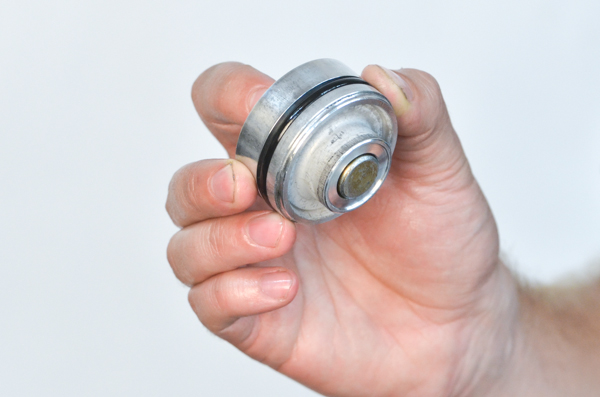
SH8 - This is the bushing as it comes out of the seal head.
|
|
|
SH9 - Install the new bushing using the reverse end of the Bushing Driver...
|
|
|
SH10 - again using a vice as a press.
|
|
|
SH11 - This is what it looks like when it is completely installed with the Bushing Driver still in.
|
|
|
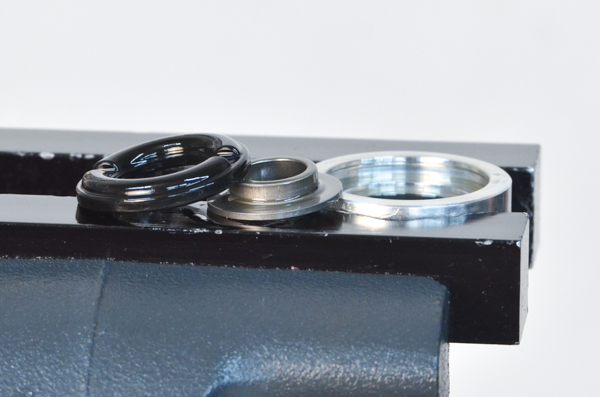
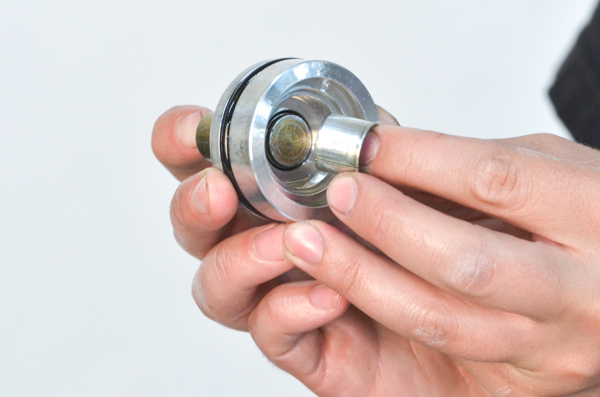
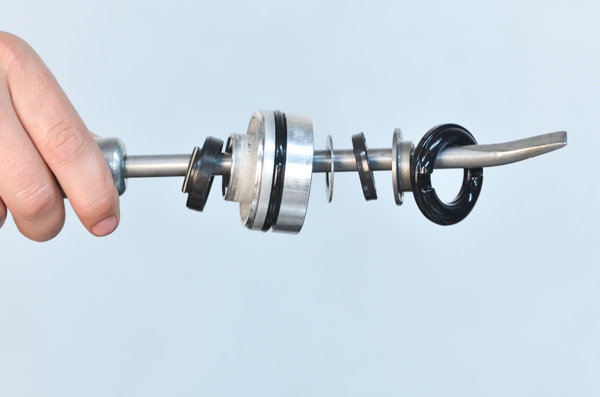
SH12 - This is an exploded view of the seal head before assembly. From left to right; Dust Seal, Seal Head Body, Seal Washer, Seal, Flanged Washer (if used), and Top-Out Bumper.
(Some Seal Heads have a Top-out Spring as well.)
|
|
|
SH13 - Clamp the Seal Head Body in the "V" of the TMVJ 065 Vise Jaws. Install the dust seal on the head with a socket that fits over the lip of the dust seal.
Alternately the vise can be used as a press instead of using a hammer.
|
|
|
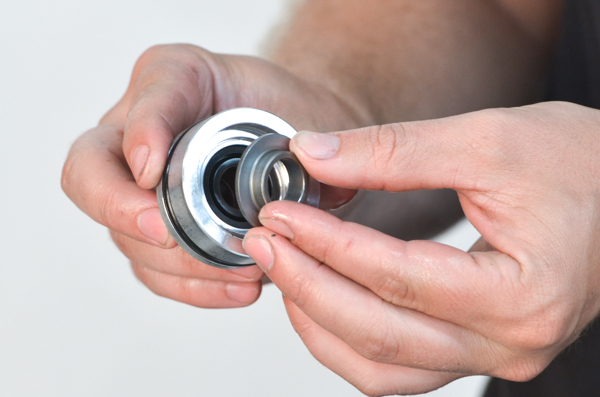
SH14 - Flip over the seal head body. Install the seal washer and oil seal. The seal is directional (there is an up and a down). The sealing edge of the seal should go towards the inside of the shock. This is the same direction it should have been when it was disassembled.
|
|
|
SH15 - This is a KYB. On this model install the flange washer. On other brands there may be slightly different hardware. Showas commonly use a Top-out Spring.
|
|
|
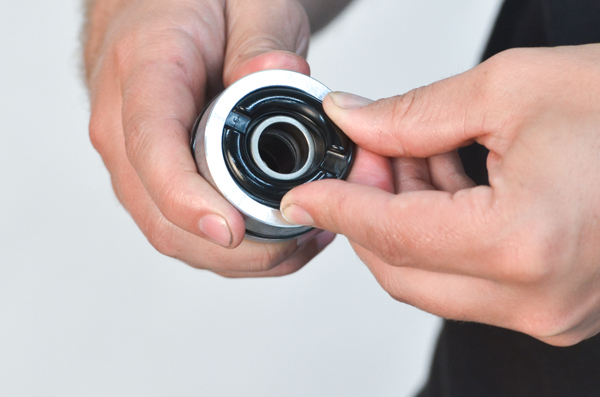
SH16 - Install the top-out bumper into it's groove and continue with rebuild.
|
|
|
SH16 - Seal Heads with a Top-out Spring. The spring can be reattached by pushing it on. If it is stubborn you can squeeze it on in a vise.
|
With the switch to the new racetech website and systems we are requesting each user reset their password in our system. Simply use our forgot password feature on the login page to reset yours.