3.3 Harley-Davidson Fork 41.25mmH-D FLH Early (1953-1973) |
||
 |
These forks were the standard for Harley from 1953 thru 1973.
The head of the Damping Rod has a protruding-top and has no piston ring. This requires an Emulator Adapter with a piston ring built in. The Check Valve mechanism has A LOT of room for imporvement. In fact there is no chance of a quality ride unless the Check Valve Assembly is replaced. The FEGV S3805 kit now has this hardware included.
|
|
 |
STOCK
If you take the clip out of the bottom of the fork tube it will look like this. This is a very complex and restrictive check valve system. Modification of the existing components have proven fruitless. The RT solution replaces most of these components with a less restrictive (and simpler) system. |
|
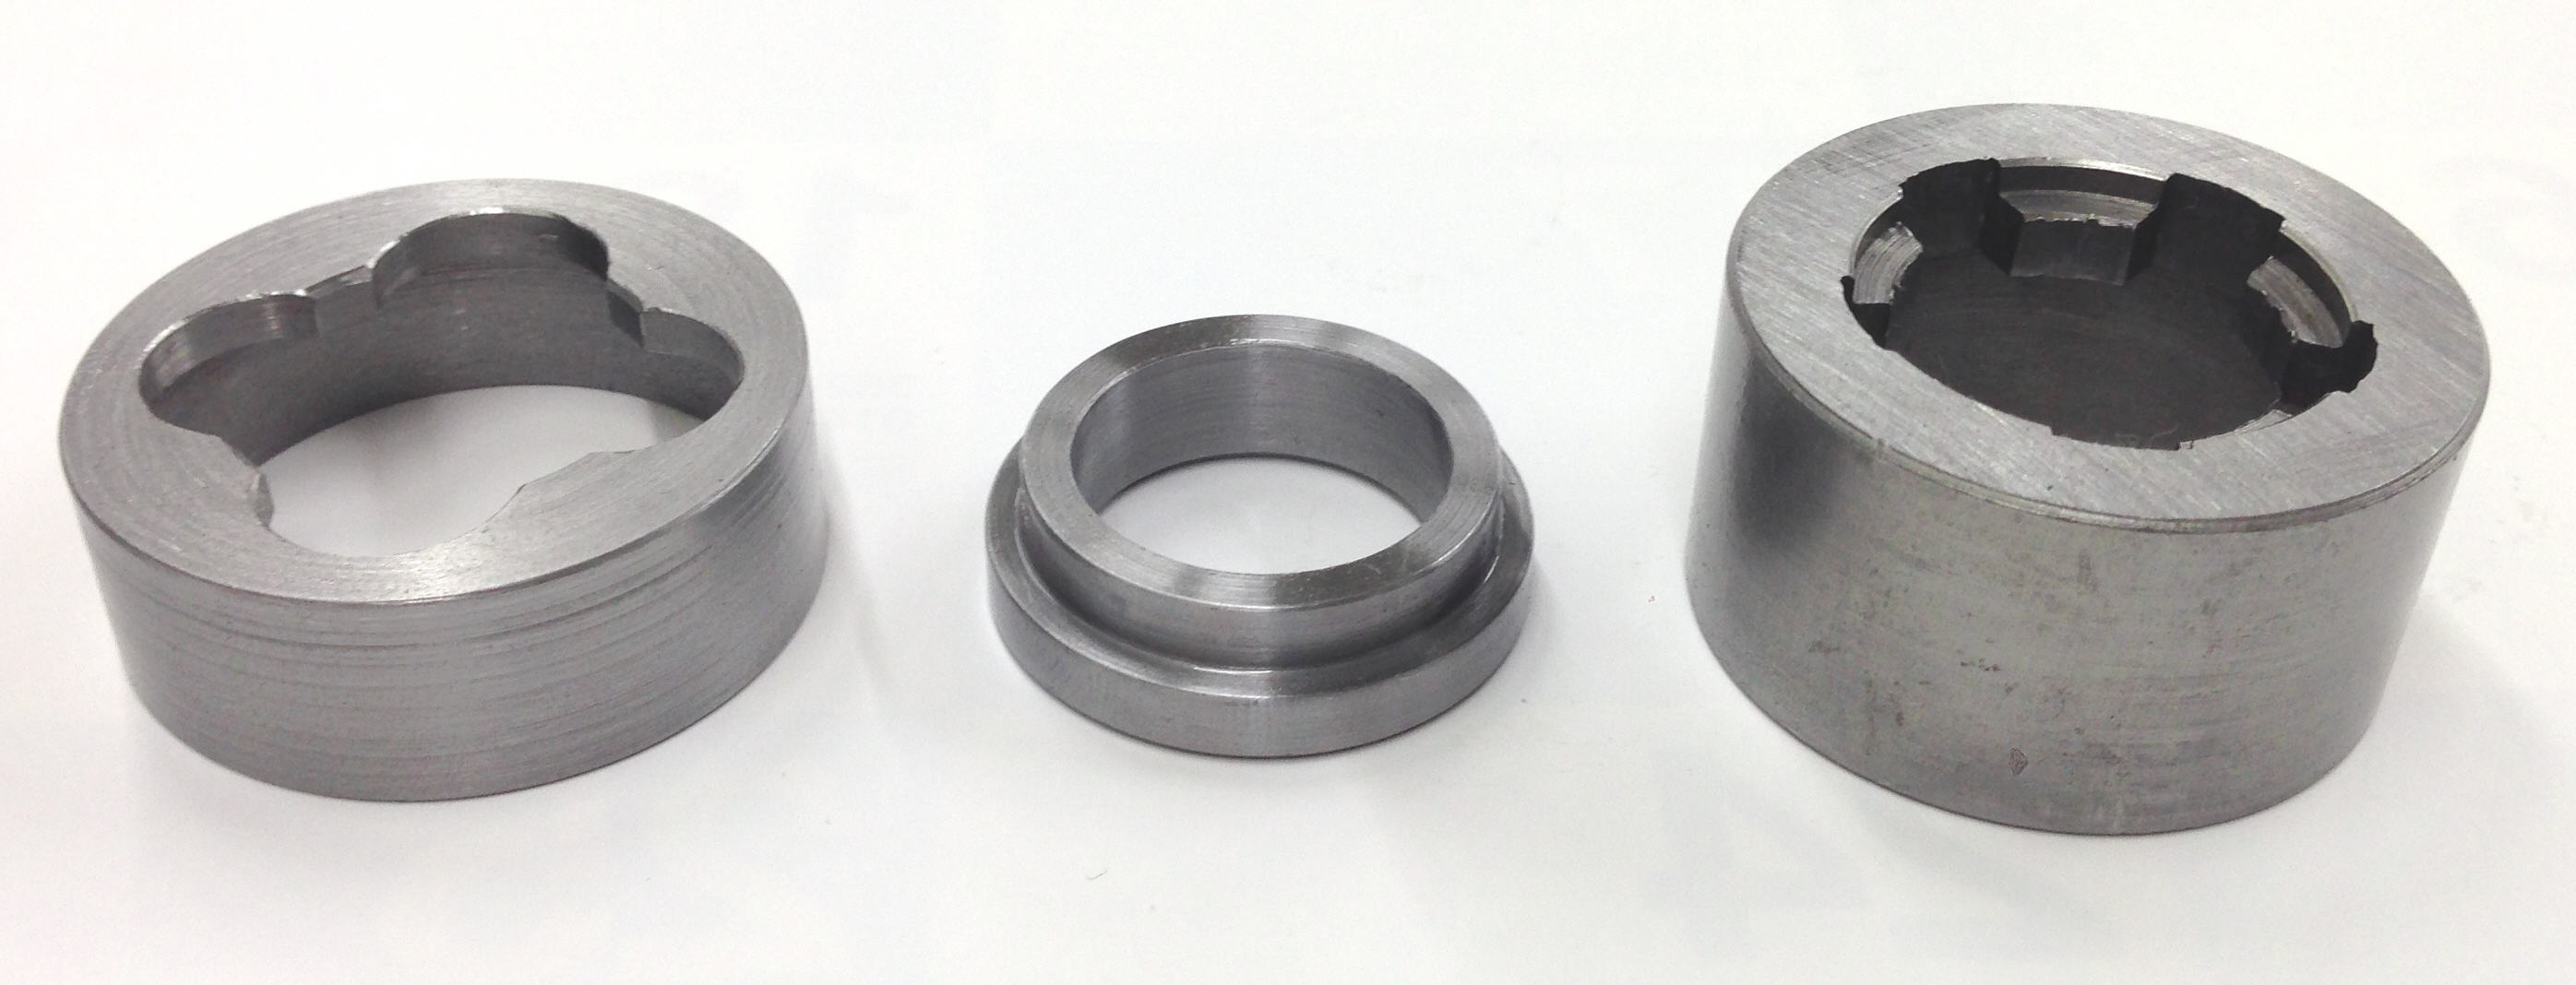 |
NEW Check Valve Assembly
Starting from the left are the new Check Valve Outer Housing and Check Valve. The stock Bottoming Cup will be reused and is on the right. |
|
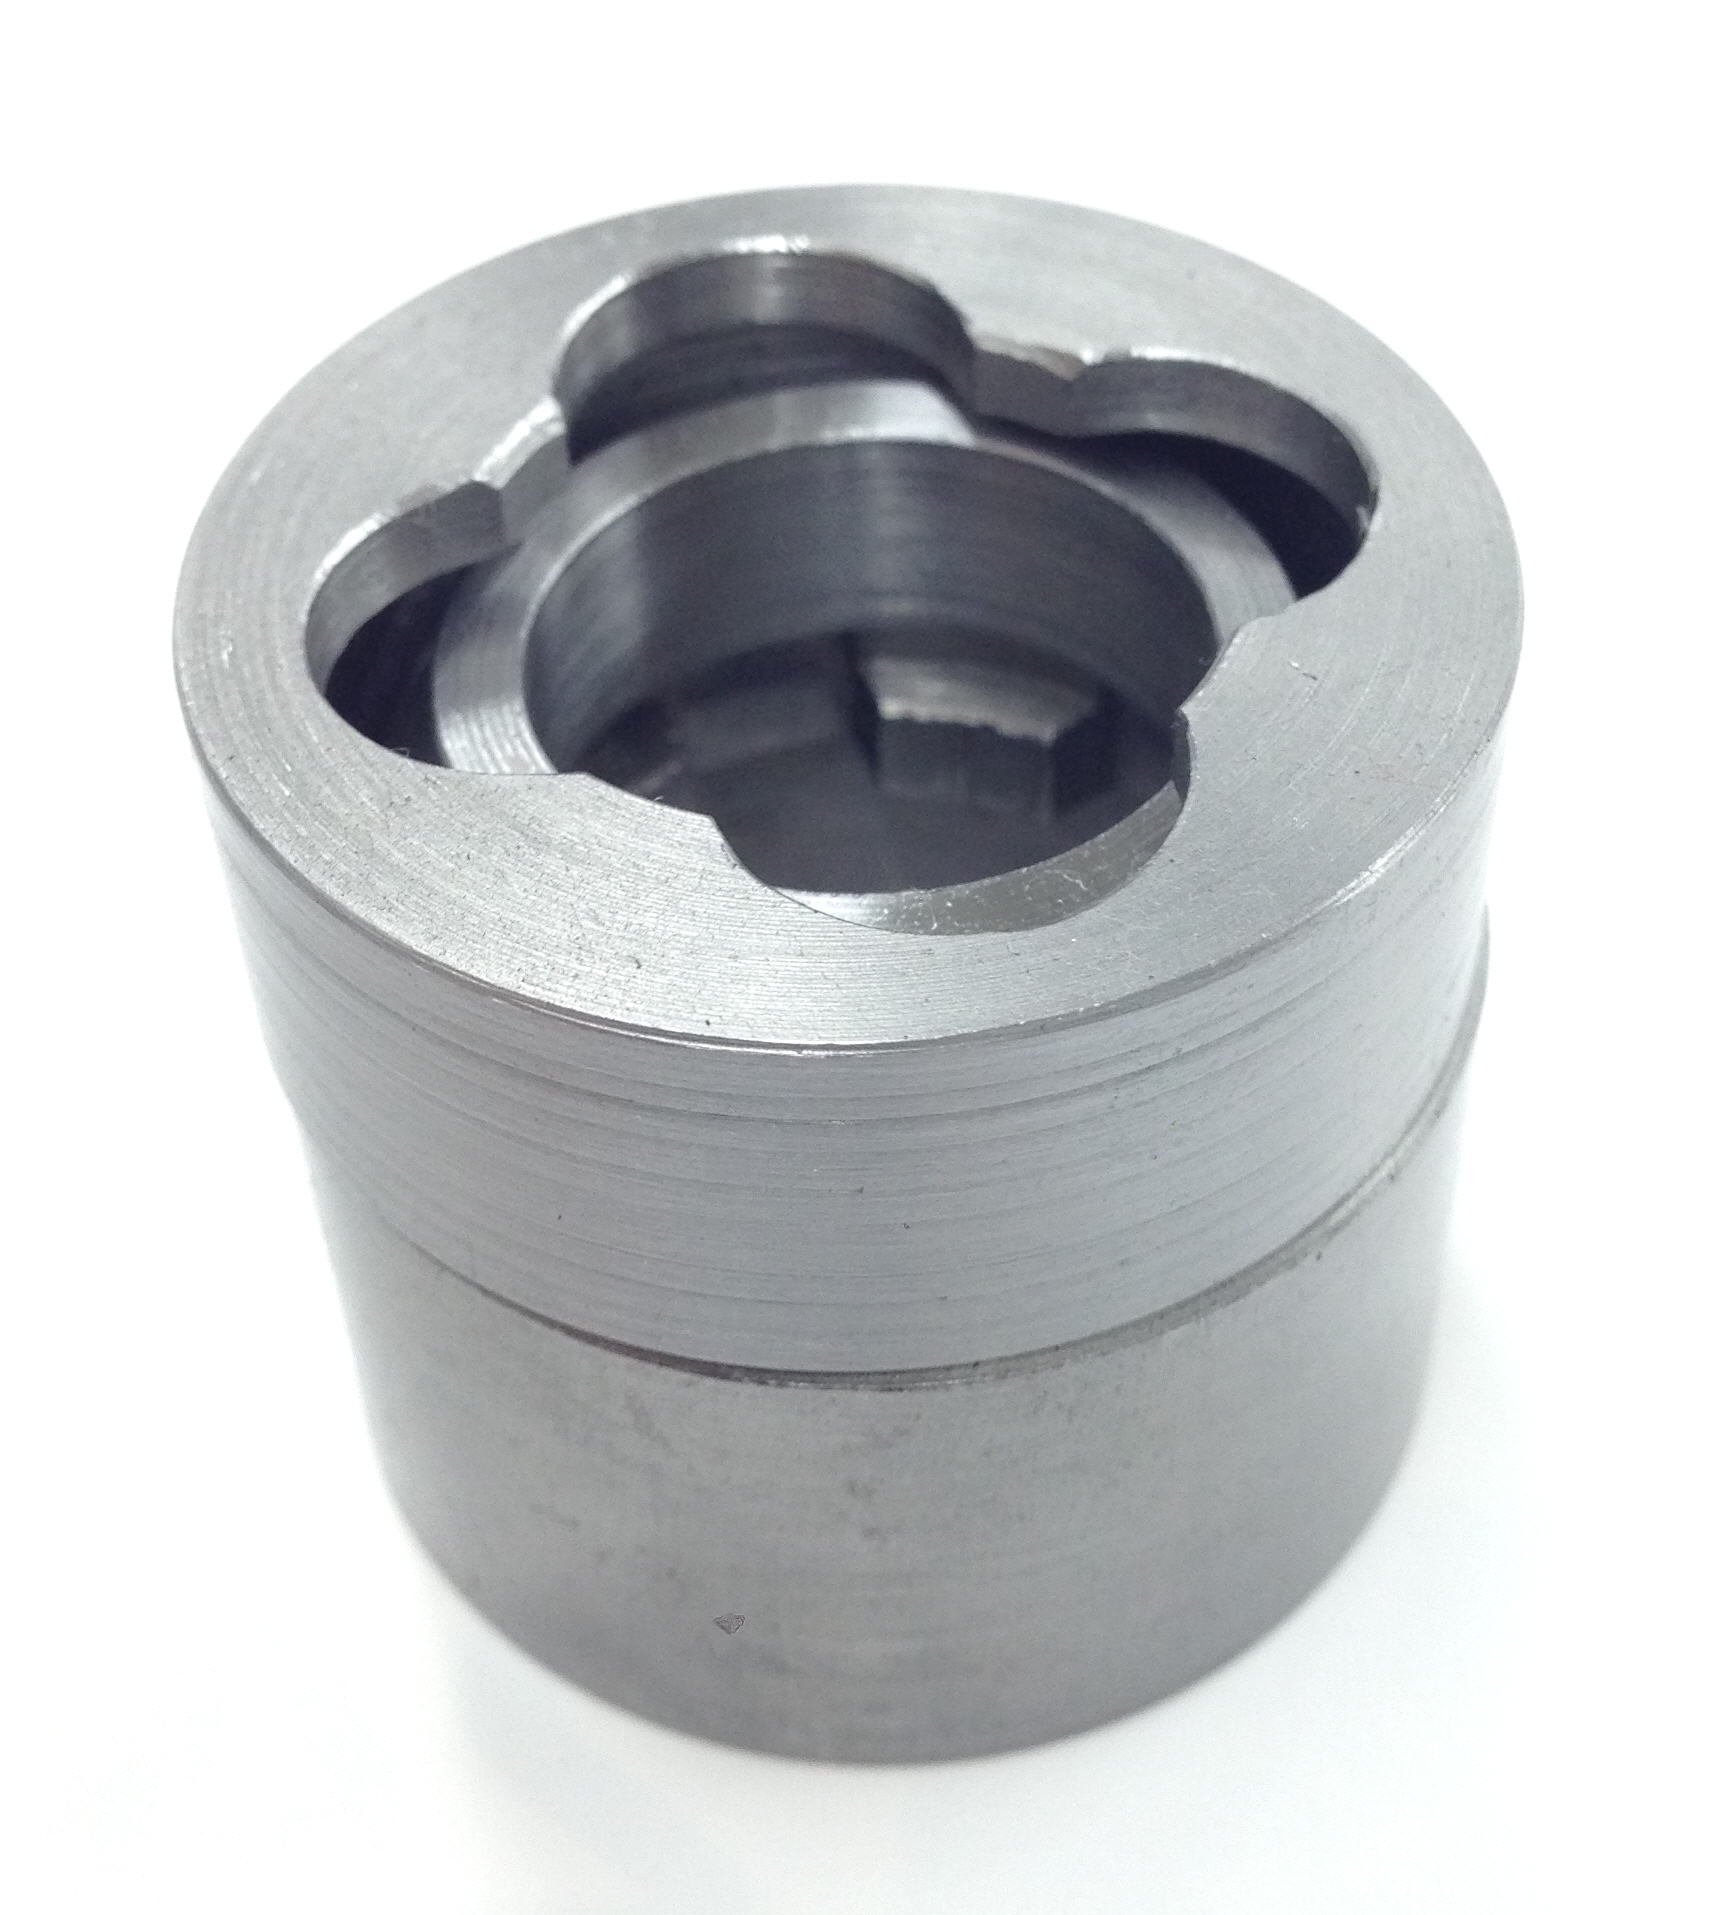 |
This is the Check Vave Assembly ready for installation into the bottom of the inner fork tube. This is the top as it sits on the bike. The Check Valve Outer Housing will be installed into the bottom of the fork tube first.
Note that the Check Valve relief side is facing up and the cupped side of the stock Bottoming Cup is facing down (like stock). See the next image for an exploded view. This assembly is held into the bottom of the chrome fork tube with a circlip. |
|
 |
NEW Check Valve Assembly Fork Tube Check Valve Outer Housing Check Valve - relief side facing up Stock Bottoming Cup Circlip - must seat into the groove all the way. This assembly is a snug fit so check it carefully. |
|
 |
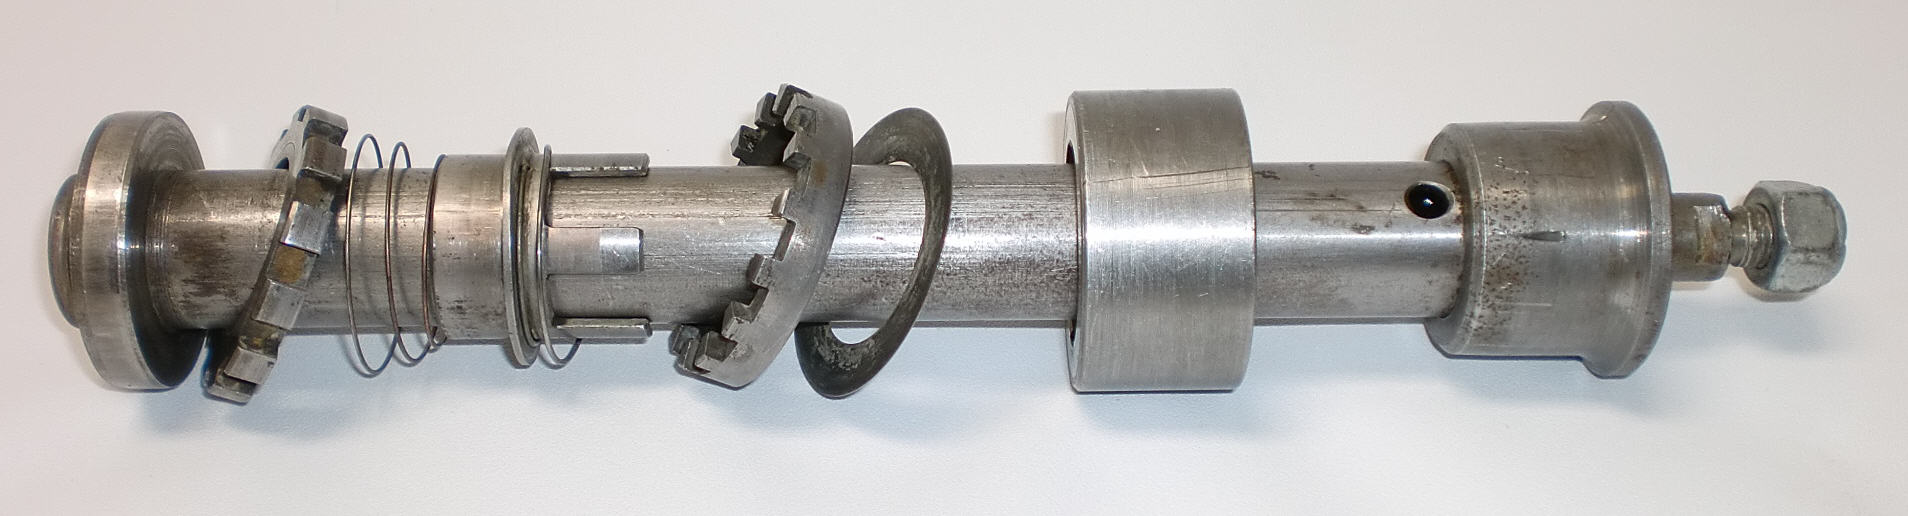
Enlarge the Compression Feed
Pictured is the bottom end of the damping rods. The stock damping rod is on the top, modified on bottom. Enlarge the original compression holes to 8mm (5/16"). Add another set of holes above (to the left in this pic) at 90 degrees to the first set. Carefully deburr inside and out. |
|
 |
Add a Rebound Hole
Drill one 2.0mm (.079" or #47 or 5/64") Rebound Hole 20mm (.787") from the bottom of the Damping Rod Head. (To be clear, this is only one hole on one side of the dampng rod - not all the way through.) |
|
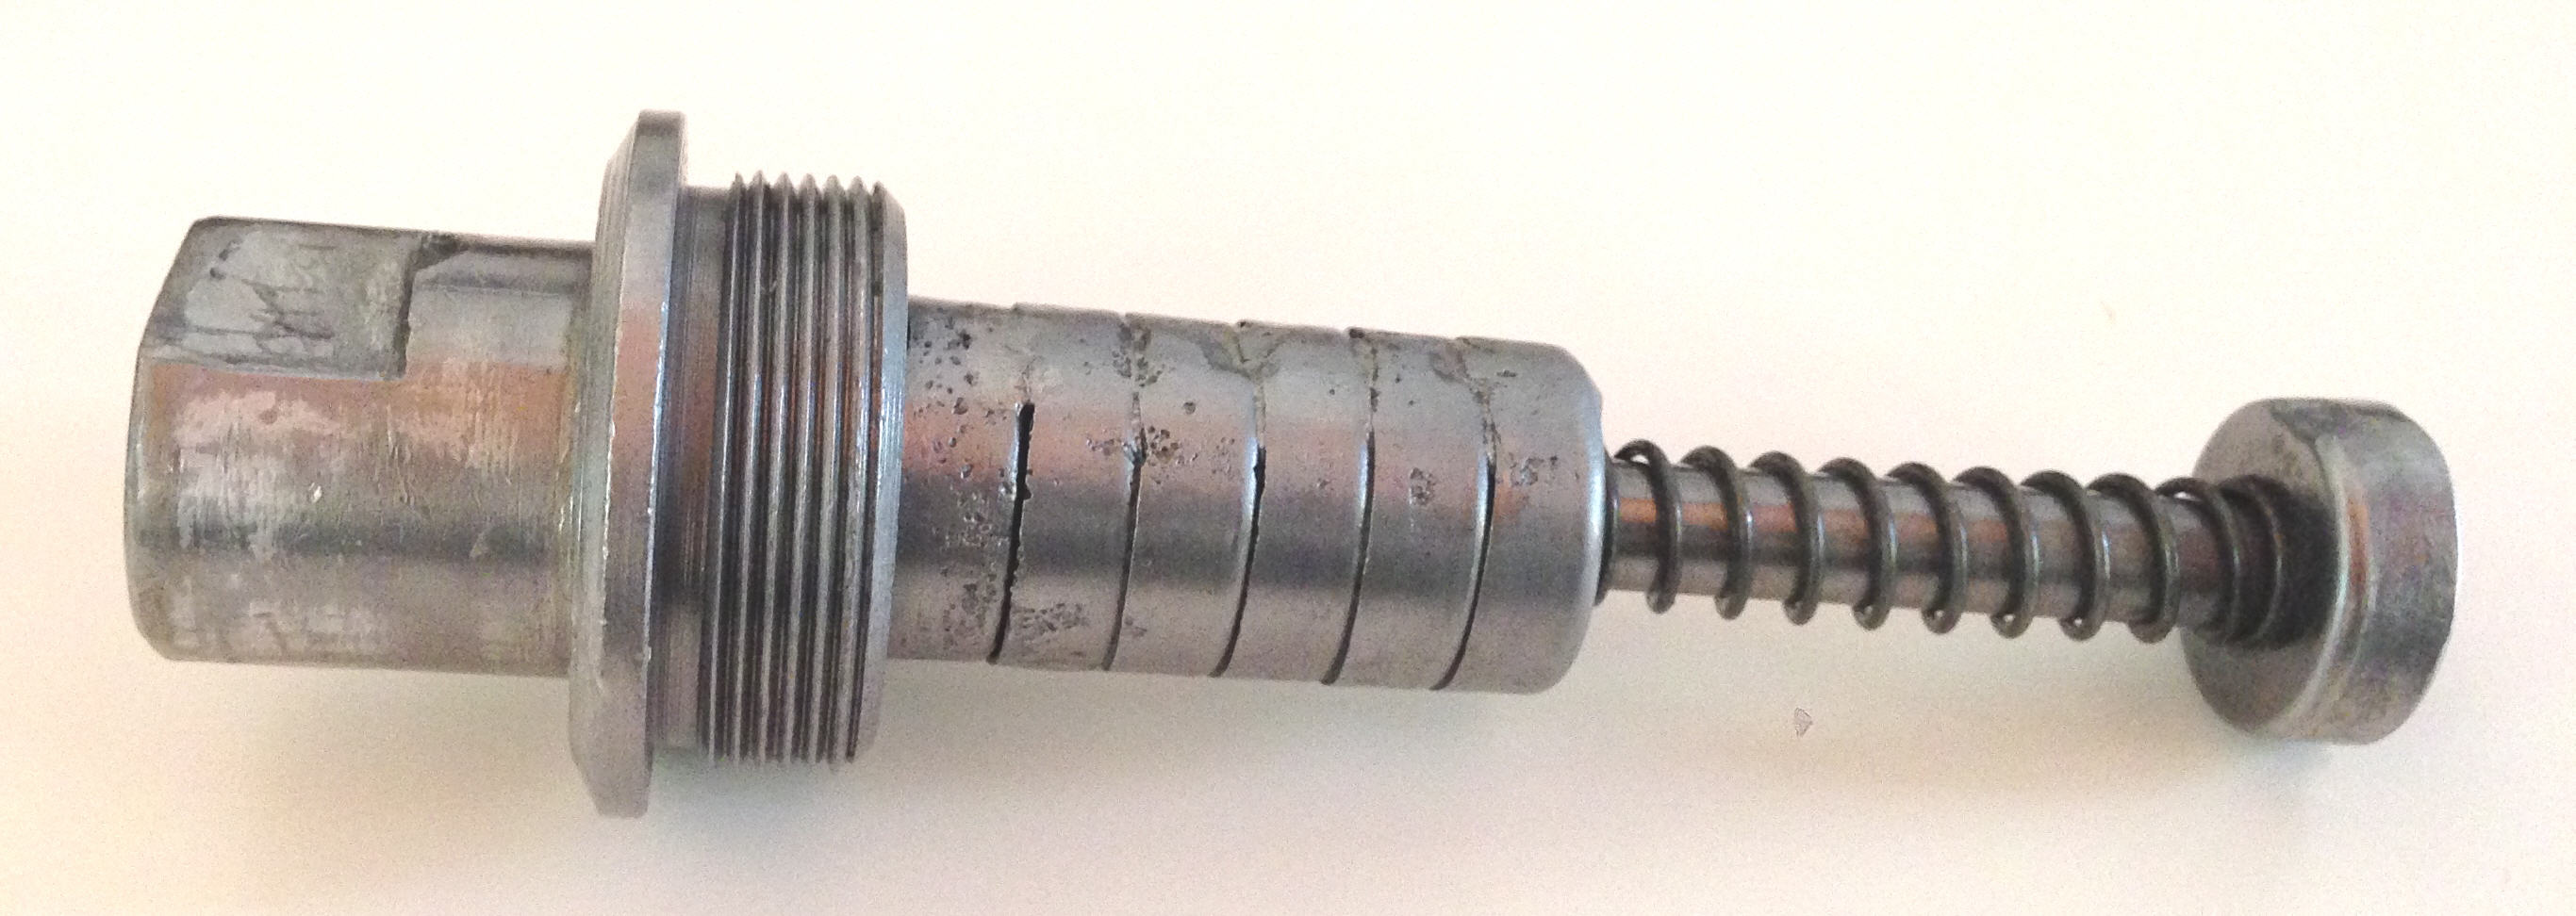 |
FORK CAP MOD - optional
The stock Fork Cap (shown) can be modified. It comes with a vented cap with a series of baffles that slow down the migration of oil out of the fork leg. Vented fork caps were popular through the late 60s. This can be removed and plugged. (It's a lot cleaner.) Here's how... |
|
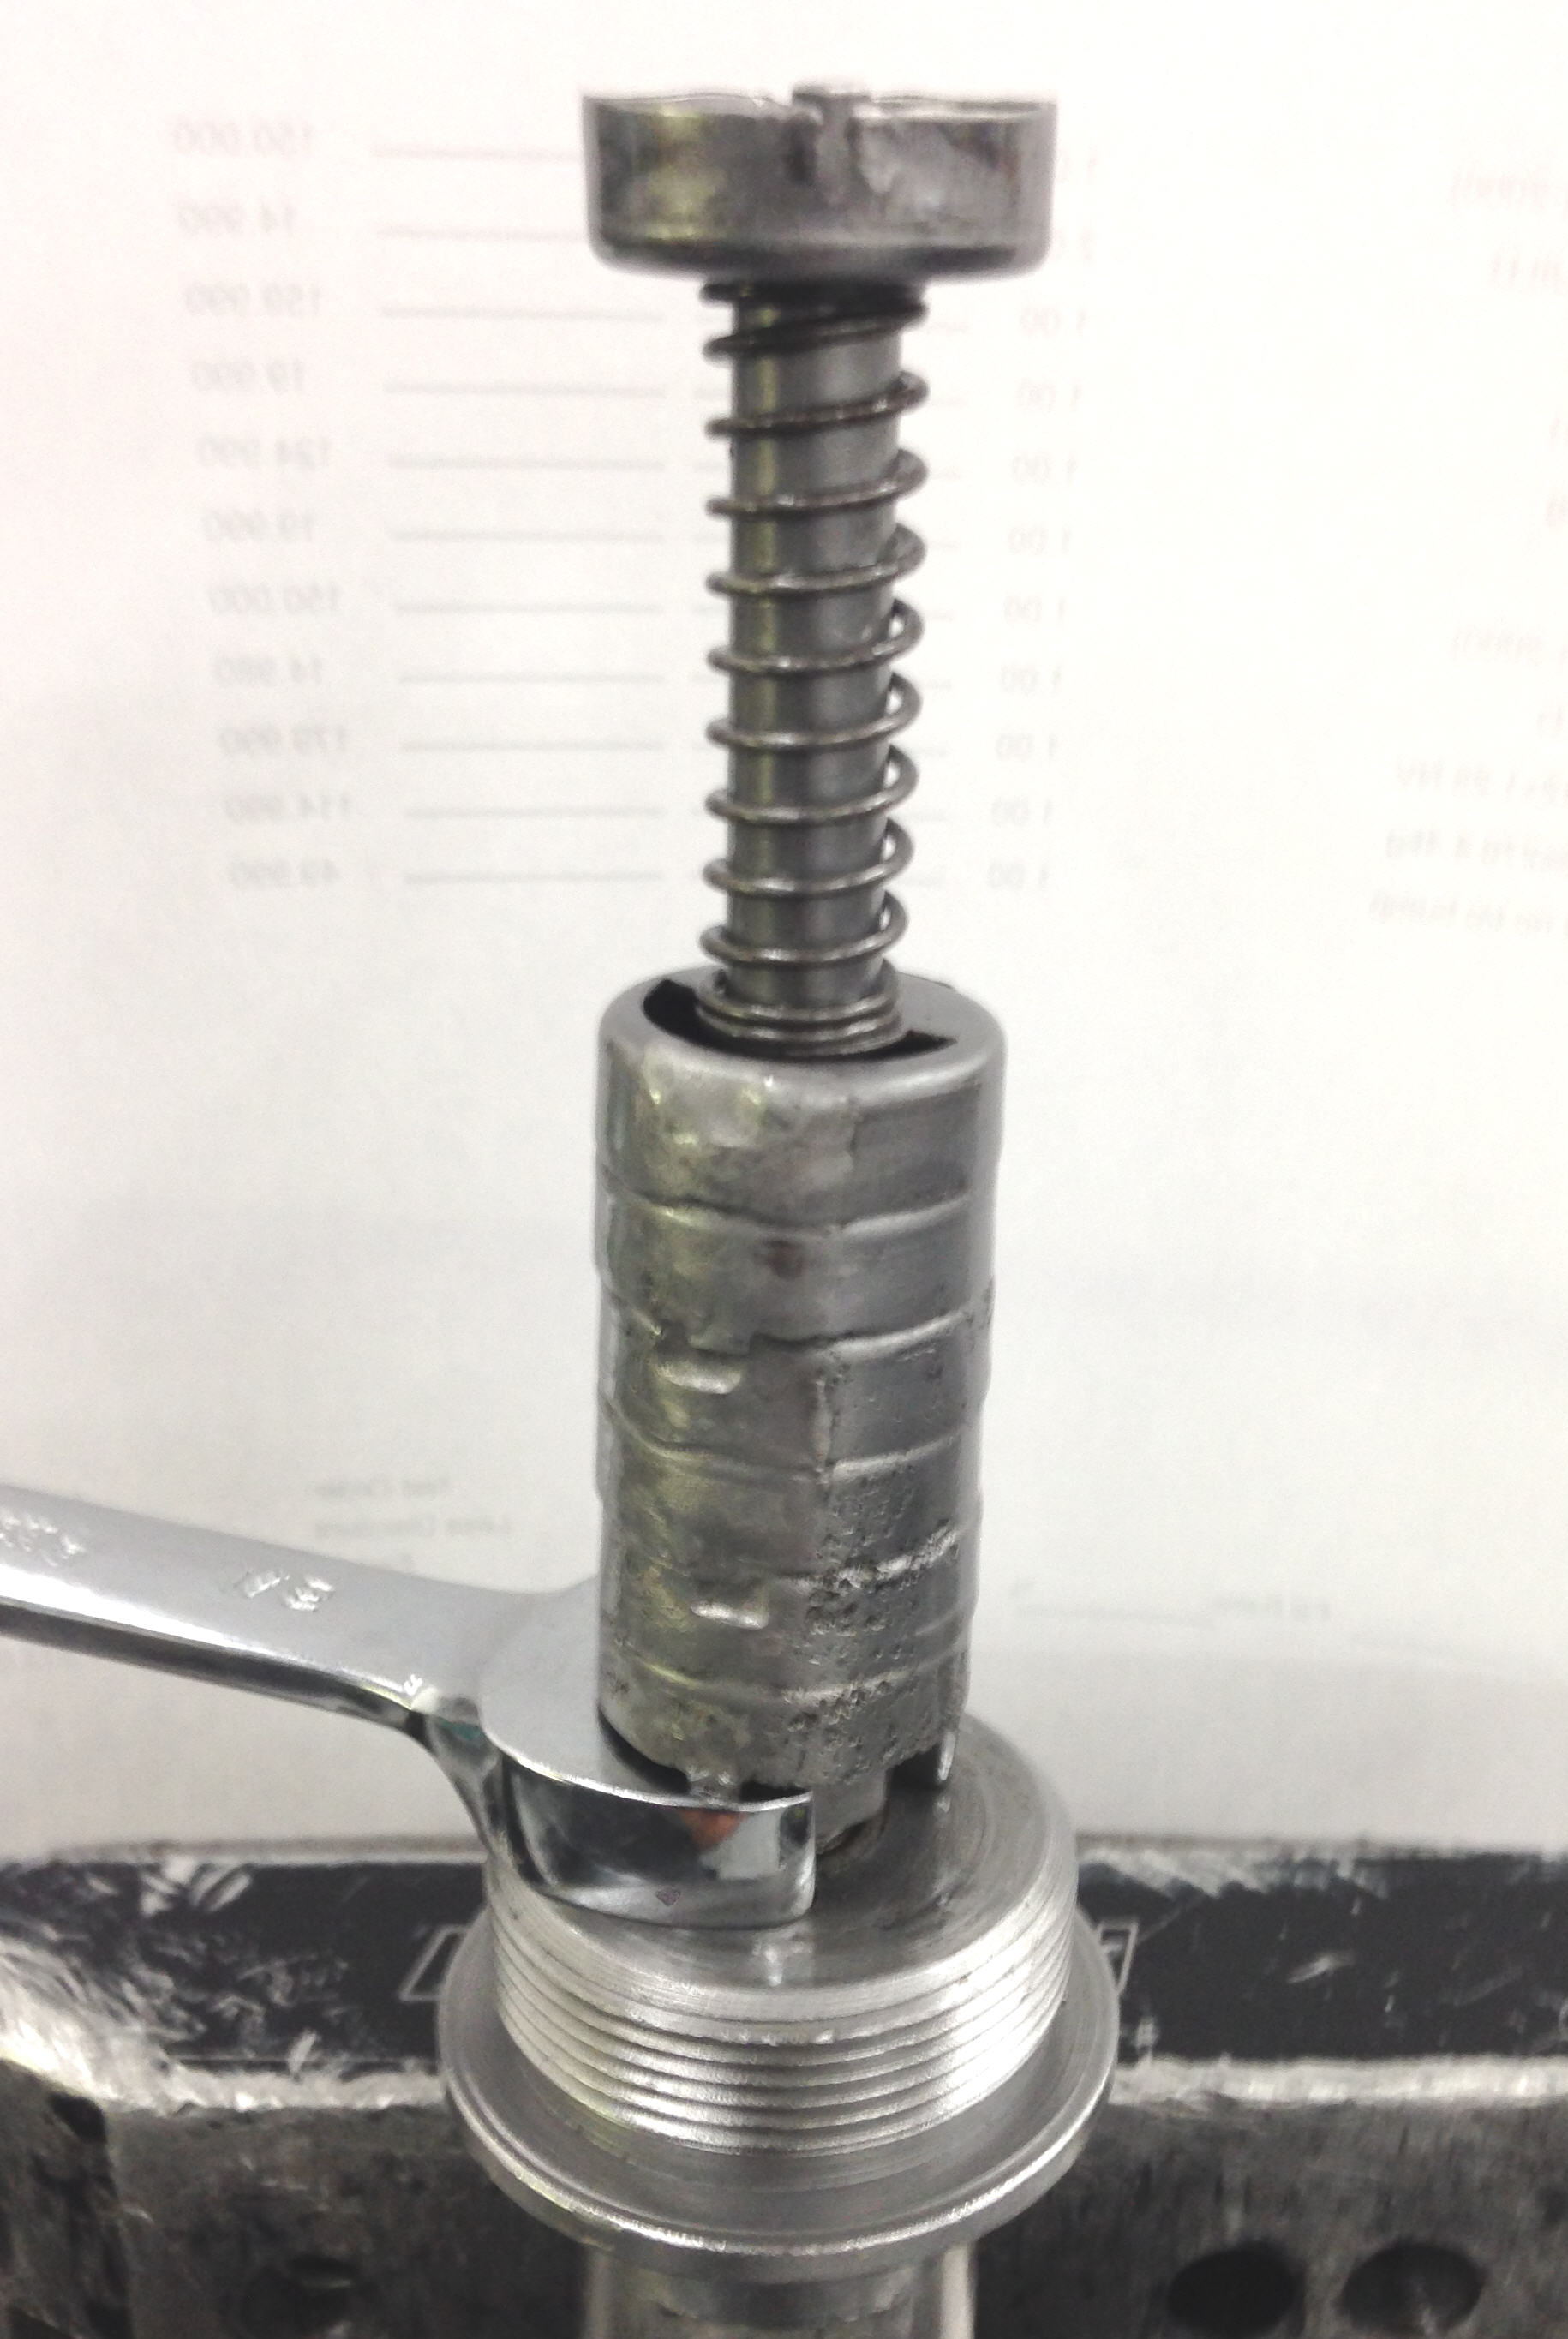 |
Remove the baffle assembly
The stack of baffles can be slid up against the spring exposing the nut. Use a 1/2" wrench.
|
|
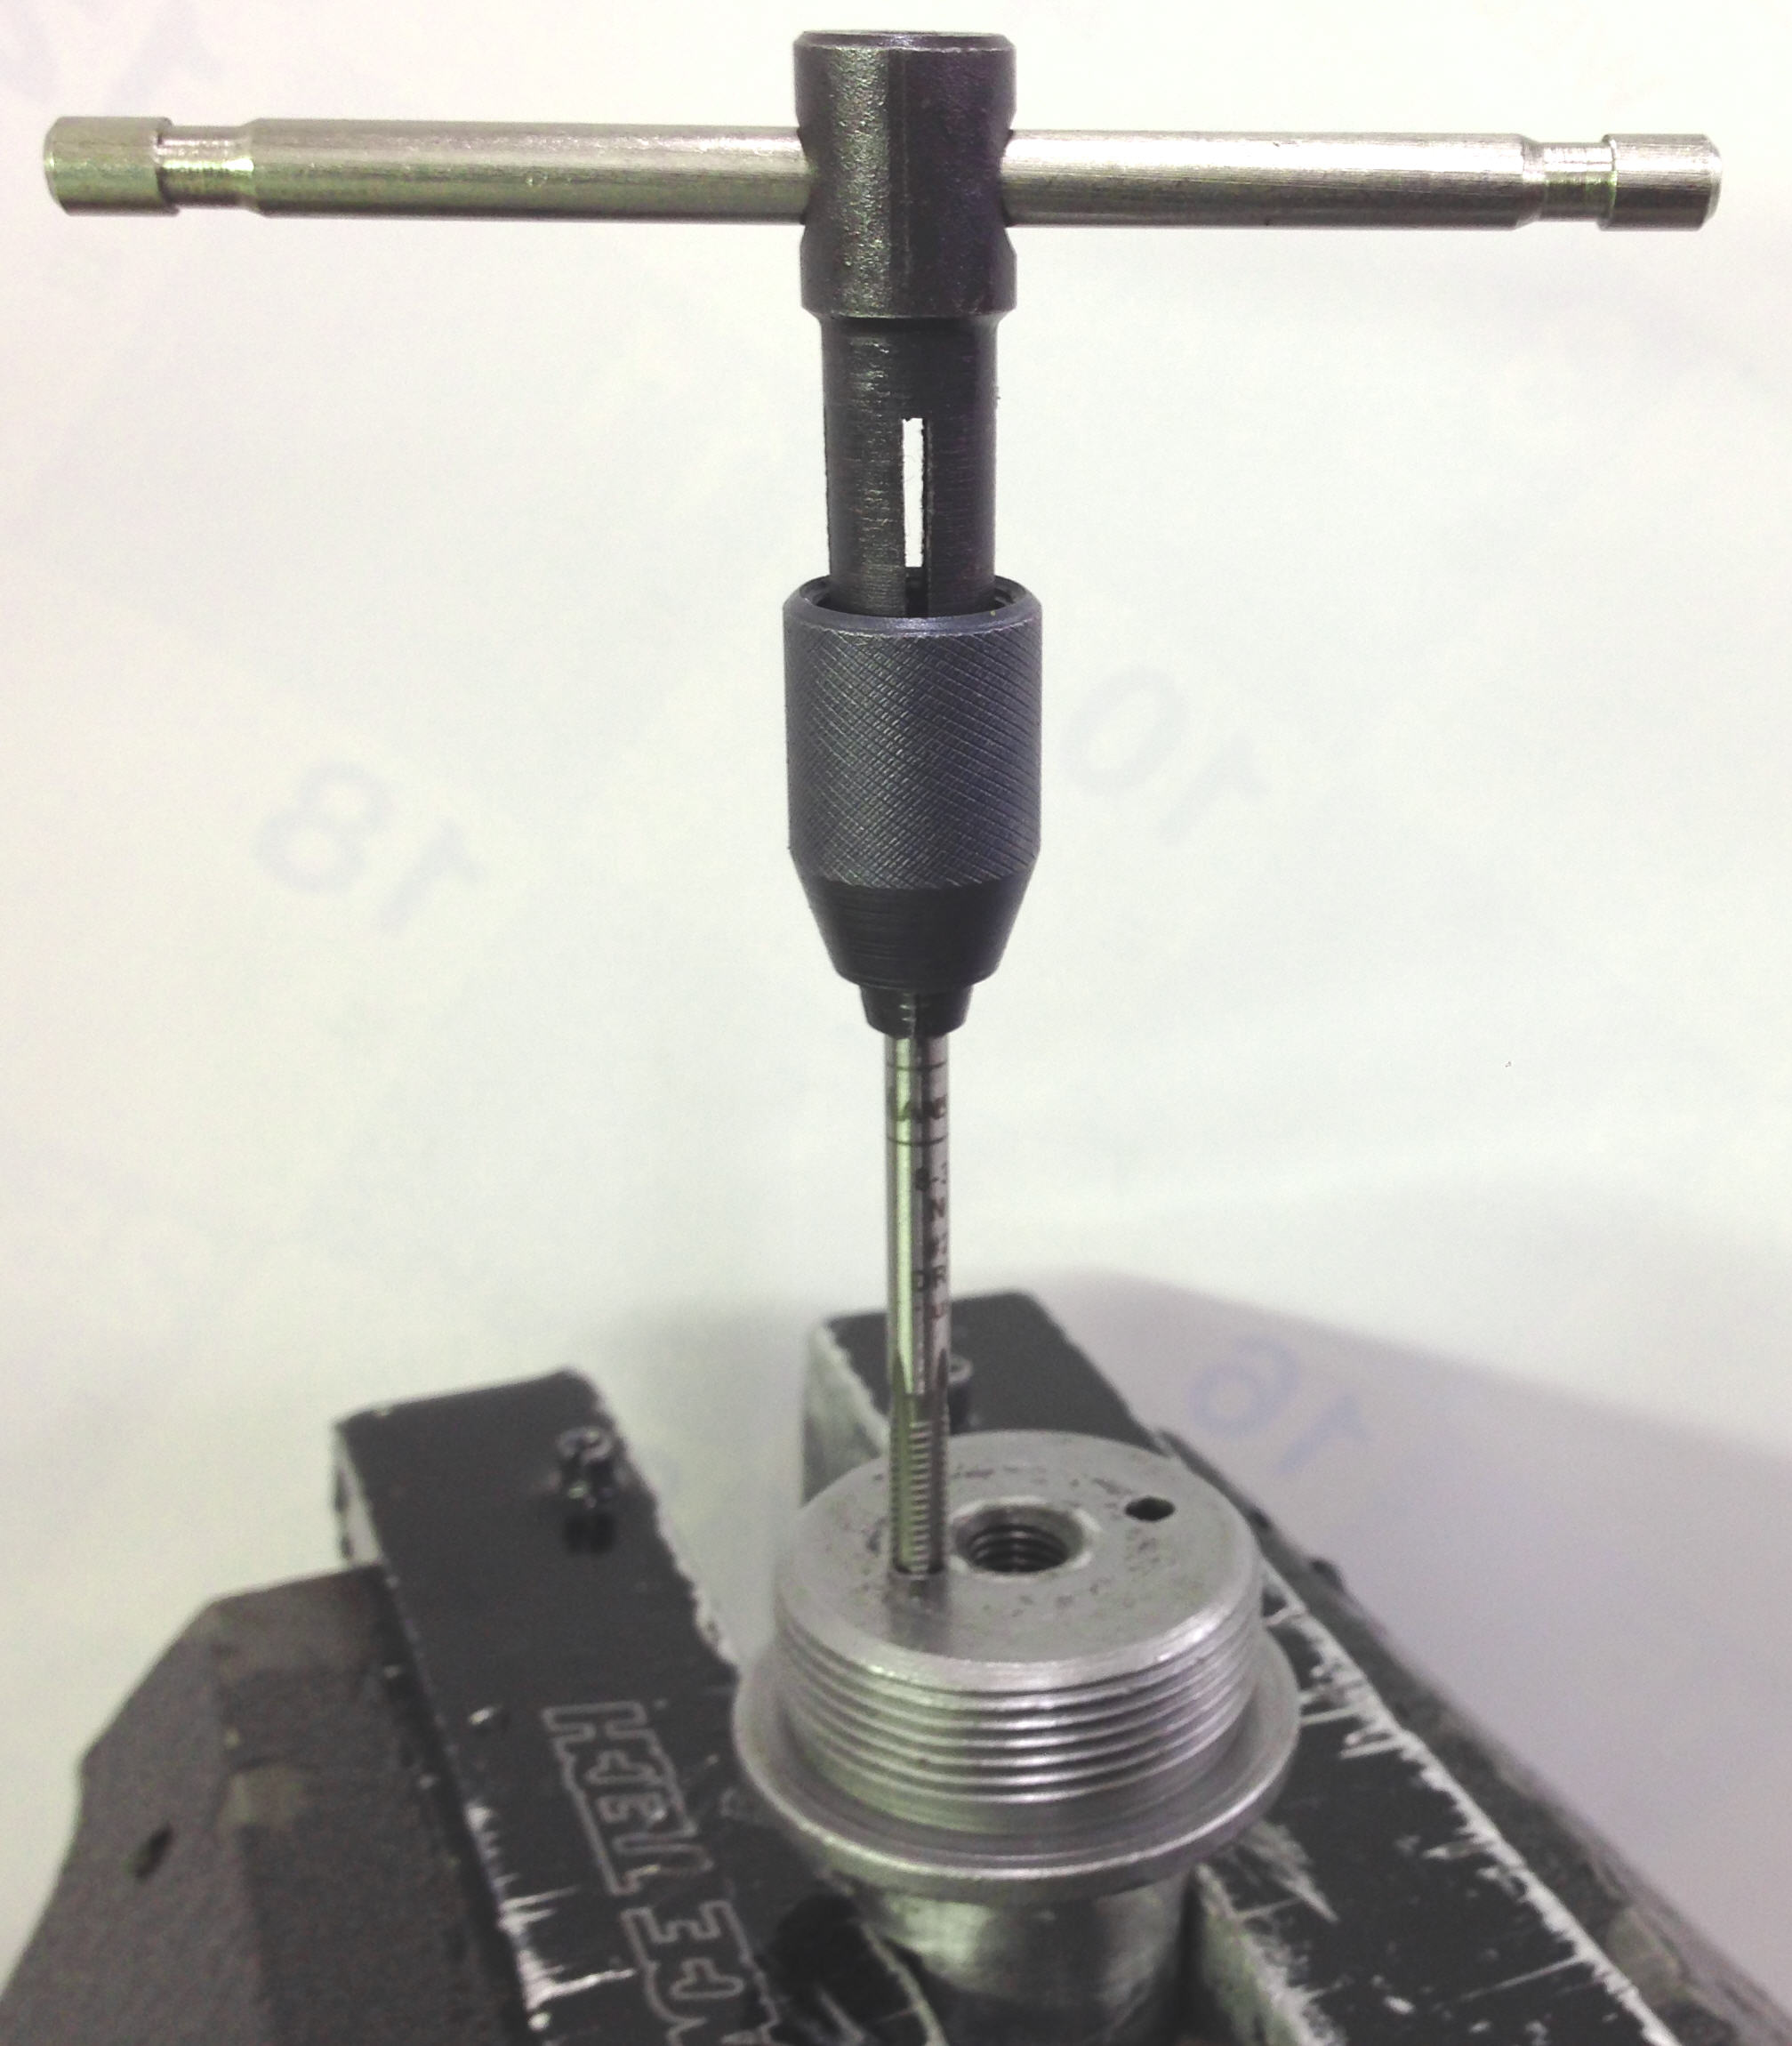 |
Seal the vent hole
There are two small holes offset from the cap centerline. One of the holes is shallow while the other goes all the way through. You can tap the one that goes through to American 8-32 and use a 3/16" long set screw with Loctite to seal it. The hole is already the tap drill size of #29 (or 3.5mm or 9/64") but check to be sure. |
|
 |
Seal the center hole
The hole in the center can be plugged with a 5/16-24 NF bolt and a copper washer. Install the HMOR 1831 o-ring on the cap. This is not stock and was not designed this way however - it works. The o-ring will tear eventually, however it will seal very well until it does. Plumbers tape will not work. |
|
|
ALIGN THE DAMPING ROD
When you install the Damping Rod into the Lower Fork Leg be sure the flats on the end of the rod align with the flats on the Lower Fork Leg. |
|
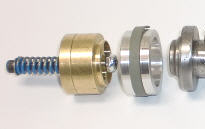 |
ADAPTERS
The Adapter is a sleeve with a piston band that goes between the damping rod and the Emulator. The main spring holds it all together. The Adapter slides in from the top of the fork. Be gentle so you don't tear the Piston Band on the inside Fork Cap Thread. You may use a bit of grease on the band to hold it into the groove in the Adapter but it should be pretty easy to install even without grease. |
|
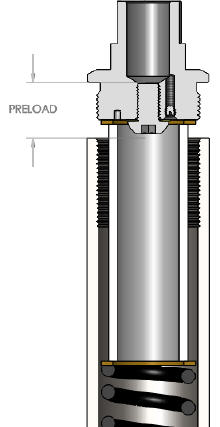 |
FORK SPRING PRELOAD
See your DVS Setup Sheet. Install the Adapter, Emulator and Fork Spring and cut spacers to set the recommended Fork Spring Preload. Be sure to use a Washer between the Fork Spring and the Spacer.
Set the Oil Level with the Adapter and Emulator installed, the forks bled, and bottomed completely.
Install the Fork Cap. Install the forks on the bike making sure the Fork Tubes are aligned (not pinched in or splayed out - this causes binding). Enjoy. Call if you need us.
See also Standard Emulator Instructions. |
|
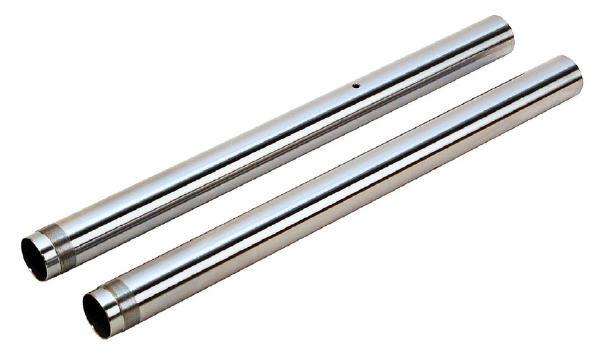 |
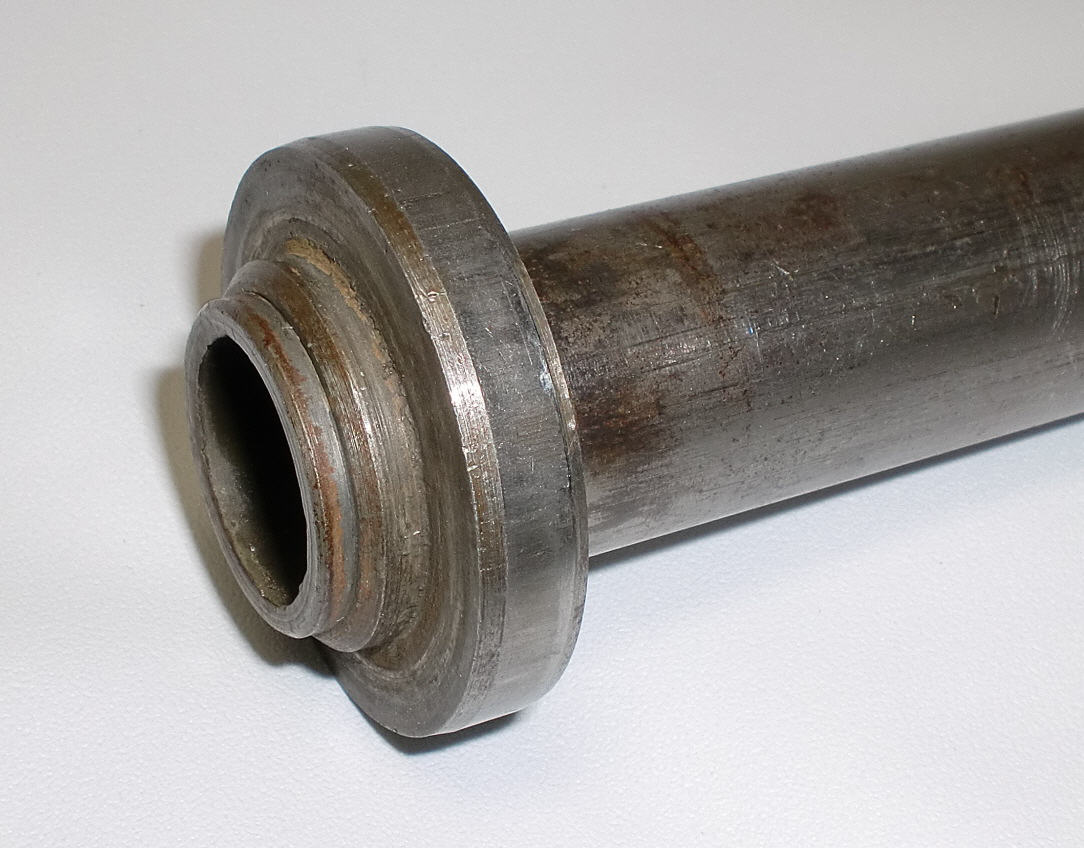
REPLACEMENT FORK TUBES
TNK Replacement Fork Tubes are available in standard and oversize lengths at RT. We keep these tubes in stock. |
|
With the switch to the new racetech website and systems we are requesting each user reset their password in our system. Simply use our forgot password feature on the login page to reset yours.
