Type 11 Small Bore Damping Rods | |
| These are difficult installations that requires either brazing or machining. This work can be performed at Race Tech if you'd prefer. On these models the bore of the damping rod is so small that the fork creates a harsh spike on hi-speed hits no matter what you do. Adding an Emulator without modification only adds to the damping. The modifications fall into two groups:
| |
Shortcuts: | |
11.1 HUSQVARNA CR 1972-74 | |
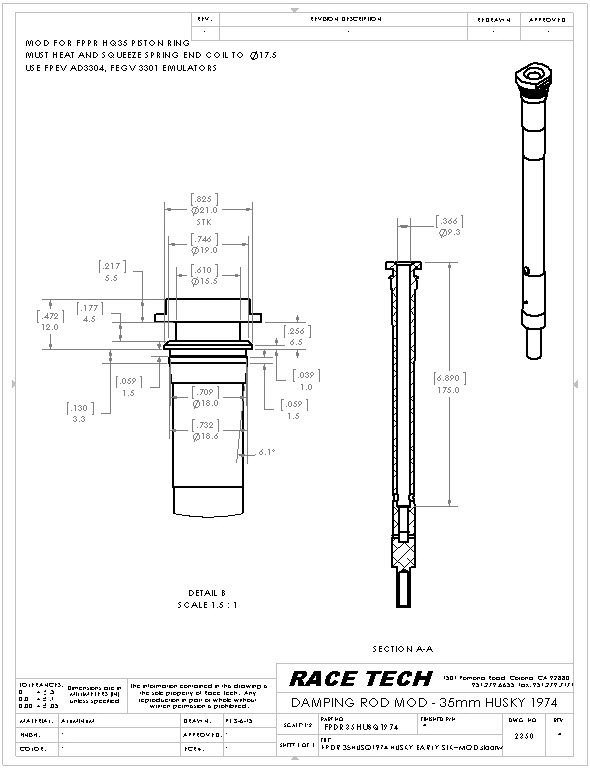
| 1972-74 Husqvarna Click on the image on the left to open the .pdf for specific machining instructions. This doc explains what to do to 1973 and 1974 models. The only major difference between 1973 and 74 is the steel tube at the bottom of the damping rod on the 74.This mod will allow the use of FPPR HQ35 piston rings that are made to fit 1975 and newer Huskys. Drill the ID to 9.5mm (3/8") with a long drill. This is trickier than you might think. Make sure the drill does not load up. Clear the chips often. Drill just past the large bottom Compression Feed Holes. Drill the two existing large compression damping holes to 6mm (1/4") and add 2 more sets of holes (6 holes total) at 10mm increments above the stock holes. Each set must be at 90 degrees to the last set More Details... | |
11.2 CZ MX250/400 1972 | |
| 1972 CZ MX Most CZ forks in this era were steel and do not have this issue. Check the bore of the aluminum rods. If it is smaller than 9mm it should be enlarged. Drill the ID to 9.5mm (3/8") with a long drill. This is trickier than you might think. Make sure the drill does not load up. Clear the chips often. Drill just past the bottom Compression Feed Holes. | |
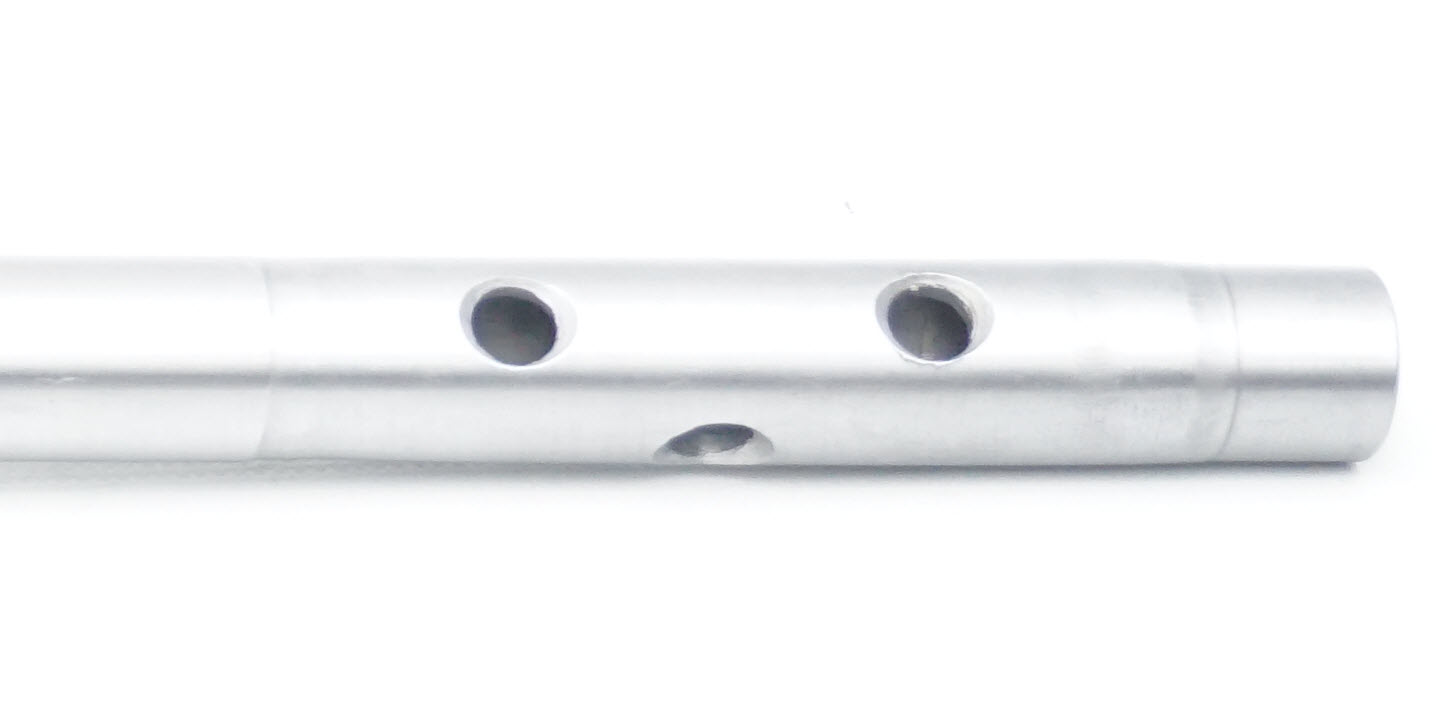
| Enlarge the Compression Feed The compression feed holes must be enlarged. Drill the two existing large compression damping holes to 6mm (1/4") and add 2 more sets of holes (6 holes total) at 10mm increments above the stock holes. Each set must be at 90 degrees to the last set. Deburr the holes inside and out. | |
11.3 HONDA XR350/500/600 1983-87BORE CANNOT BE ENLARGEDBRAZING REQUIRED | |
Modified Rod Ready to Install |
|
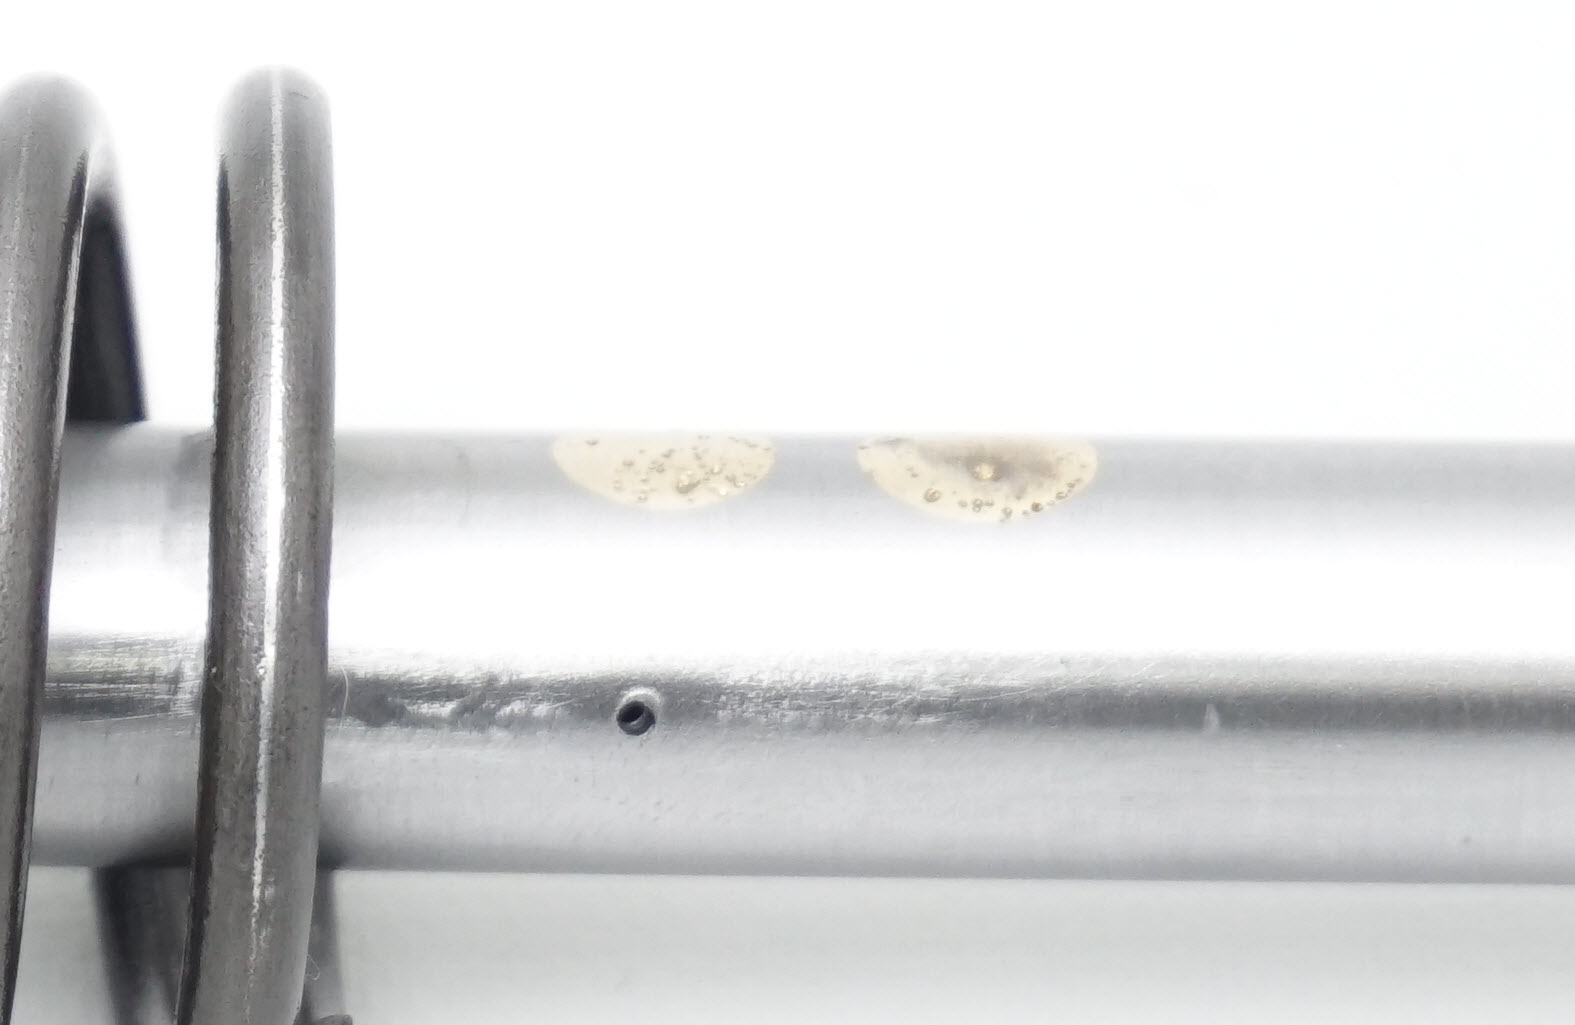
| The Tricky Part - Brazing Required Braze the stock rebound holes shut. Completely file the excess braze flush with the damping rod surface. When surfacing the excess brass off be careful to remove as little steel as possible from the damping rod as this will decrease rebound damping. Yes, this is the same picture as the next one. I don't have a good straight on shot. | |
| Add A Rebound Hole Drill one new 1 mm (#60) hole at the same height as the original top rebound hole. Lightly deburr the hole inside and out.
| |
| Enlarge the Compression Feed Drill the two original compression holes out to 6mm (1/4"). Add 2 new sets of holes 10mm (7/16") above the first set at 90 degrees to maintain rod strength. You will end up with 6 holes total. Deburr holes inside and out. | |
| Finish the Assembly See Standard Emulator Instructions for spring preload and oil level guidance. Set the spring preload and oil level according to the DVS Setup Sheet. Use USF05 5wt oil with this modification. Use 20w if you don't. This is a flat-top damping rod. The Emulator has a built in Adapter for this model. Reassemble and enjoy! | |


